




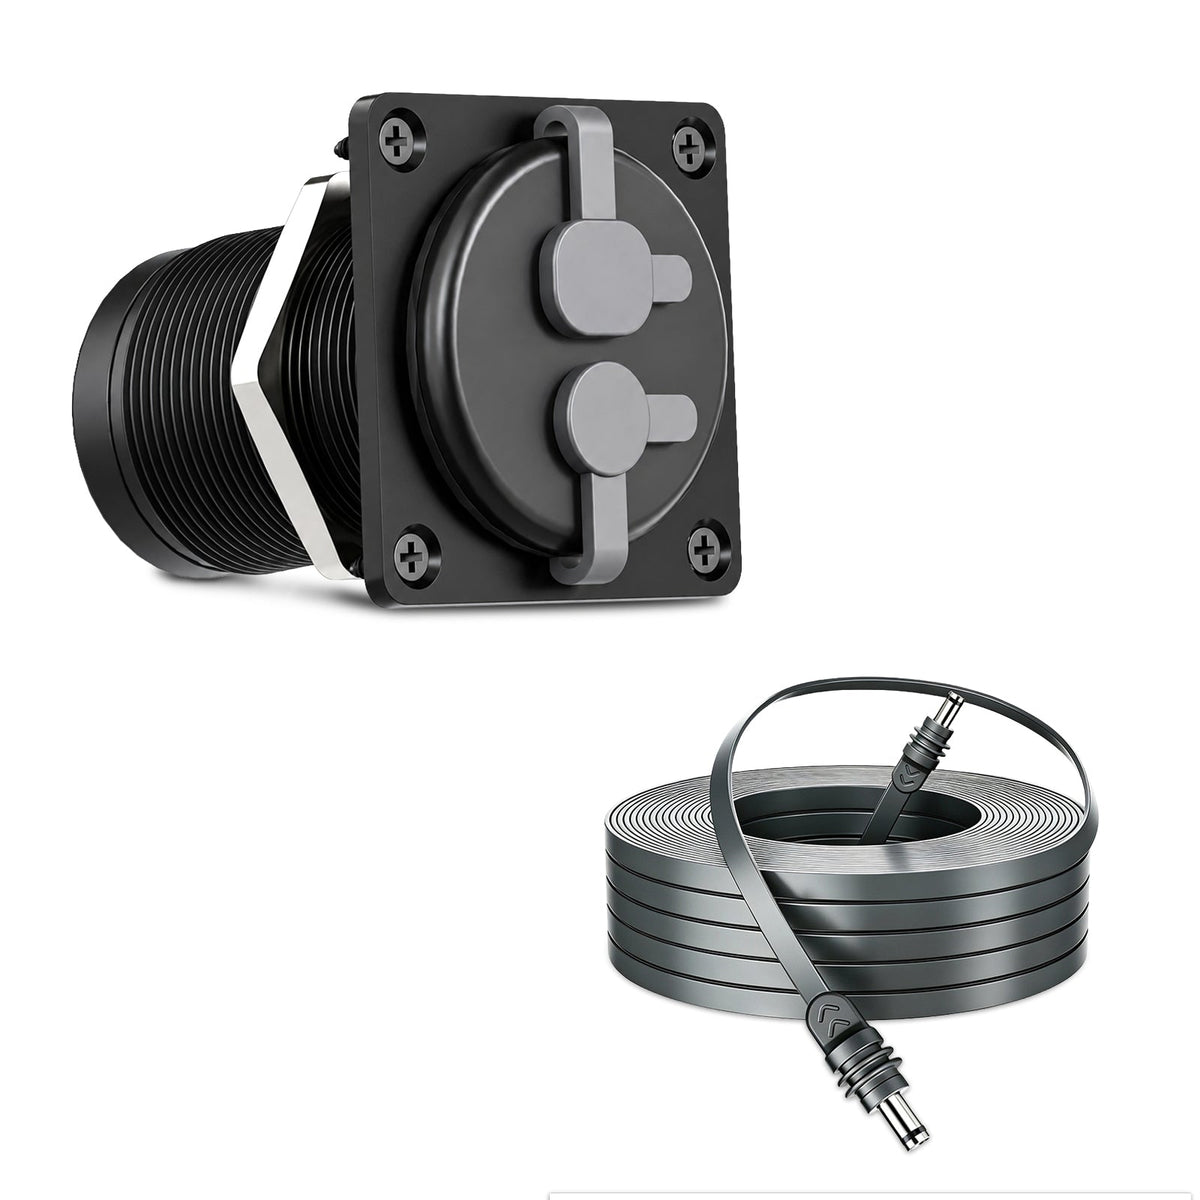
Starlink Mini & Gen 3 2-in-1 Aluminum Cable Pass-Through Panel - Waterproof RJ45/DC Female Couplers

Check the selected Tesla model, model year, and option before checkout. If this product has a Car Model or Compatible Model selector, choose the option that matches your vehicle.
- Use the product images and variant name to confirm the correct version.
- If you are unsure about fitment, contact Tesstudio with your Tesla model and production year before ordering.
Tesstudio installation support is available for Tesla owners who need help choosing, installing, or troubleshooting accessories.
Most Tesstudio accessories are designed for straightforward DIY installation. For powered upgrades, wiring, lighting, or large exterior parts, professional installation may be recommended.
Local installation and technical support
- Address: 14761 Franklin Ave # G, Tustin, CA 92780
- Technical support: +1 (657) 543-9876 or +1 (657) 565-1007
- Support hours: Monday-Friday, 8:30 AM-5:30 PM
The phone numbers above are for technical installation support only. For orders, shipping, returns, or general customer service, contact:
- Email: support@tesstudio.com
- WhatsApp: +1 714 317 9647
Tesstudio checks fit, material, and daily-use durability before listing products for Tesla owners.
- Eligible products include warranty support for non-human damage issues.
- If a product arrives damaged or does not fit as expected, keep the packaging and contact us with photos so we can help quickly.
In-stock items are usually processed within 1-2 business days. Delivery time depends on destination, product size, and stock status.
- Orders over $99 qualify for free standard shipping where available.
- Oversized, remote-area, pre-order, and special-market items follow the terms shown on the product page.
- Tracking is provided after dispatch.
Need help before or after purchase?
Contact Tesstudio support:
WhatsApp
+1 714 317 9647
Choose options
Bring Power and Ethernet Through One Clean Exterior Panel
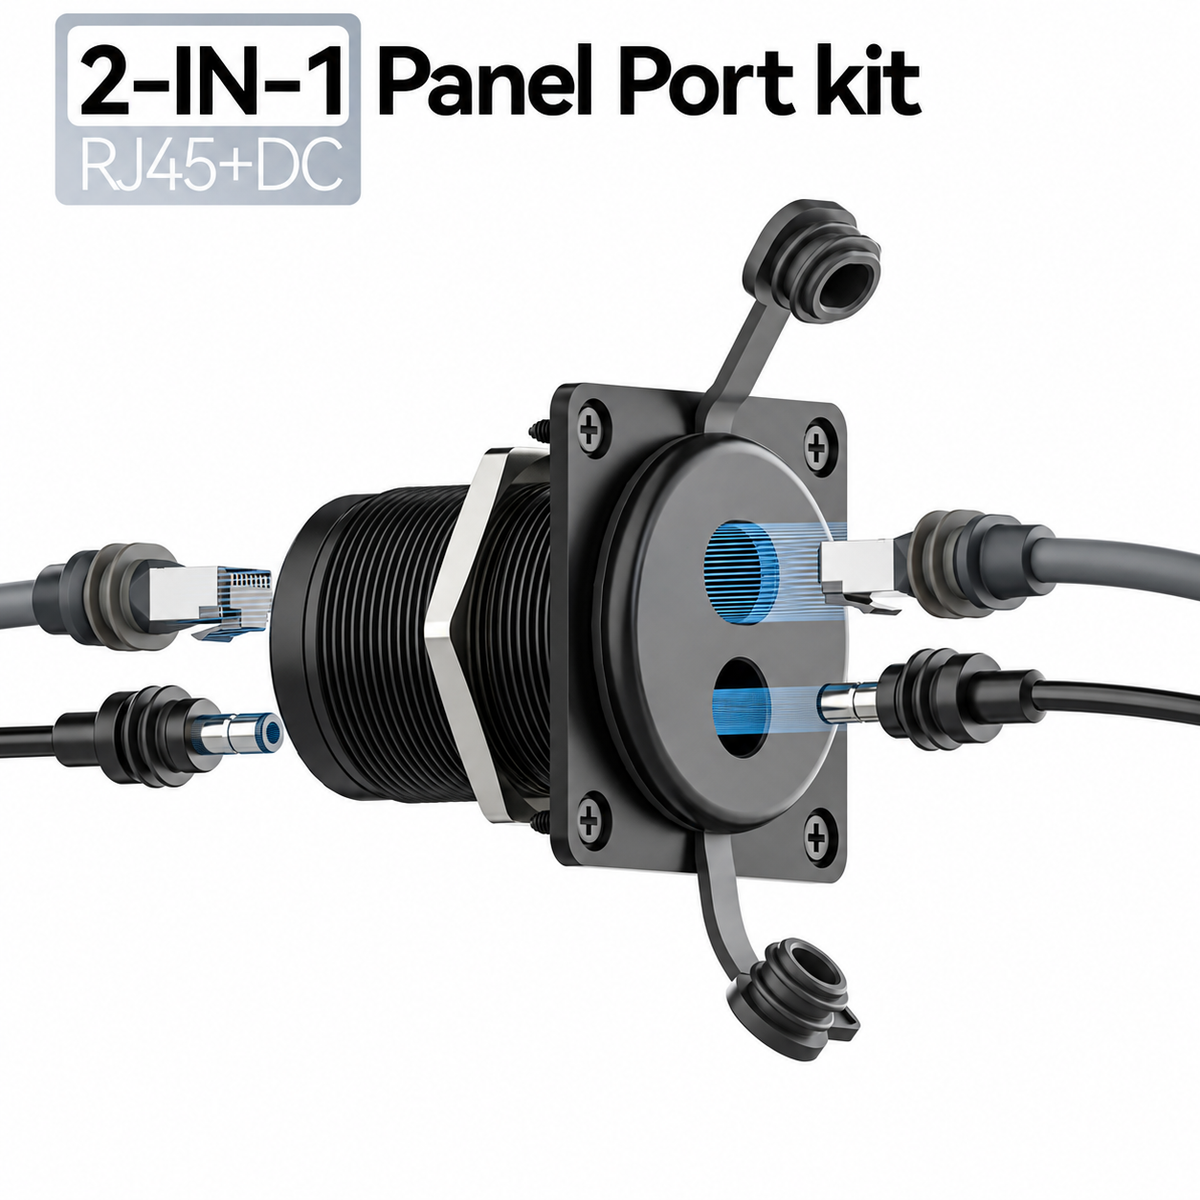
A compact 2-in-1 pass-through panel designed for compatible Starlink Mini and Starlink Gen 3 cable setups. Route RJ45 Ethernet and DC power through an RV, van, trailer or marine wall while keeping the exterior connection cleaner and easier to disconnect.

Stop Running Starlink Cables Through Doors and Temporary Gaps
Loose Cables Through Windows, Doors or Exterior Gaps
Temporary routing can leave long cables moving between indoor and outdoor spaces, make setup slower, and create an untidy connection every time Starlink is deployed.
One Fixed Location for Power and Ethernet
Install a dedicated exterior interface so compatible cables can connect outside while the indoor cable route remains in place inside the RV, van, trailer or enclosure.
Two Connections. One Compact Panel.
RJ45 Pass-Through
Route a compatible Ethernet connection through the mounted panel without feeding the entire cable indoors.
DC Power Pass-Through
Add a dedicated DC barrel connection for compatible Starlink Mini power-routing setups.
Protective Caps
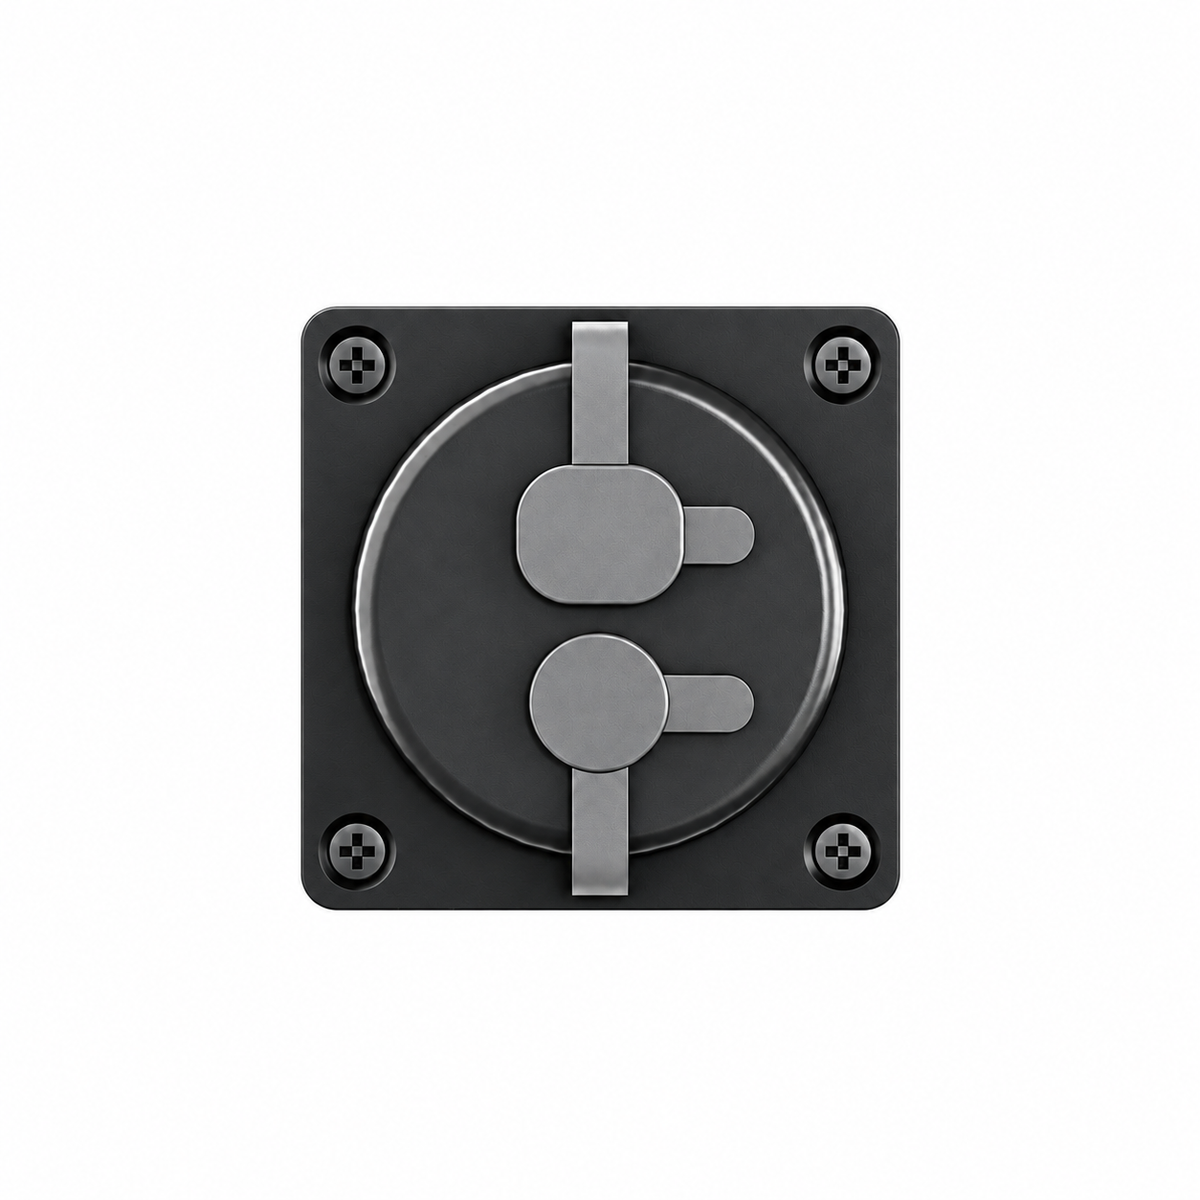
Independent rubber caps cover the exterior ports when individual connections are not being used.
Compact Footprint
Combines two useful connections into one small exterior mounting location.
Plug In Outside. Keep the Internal Cable Route in Place.
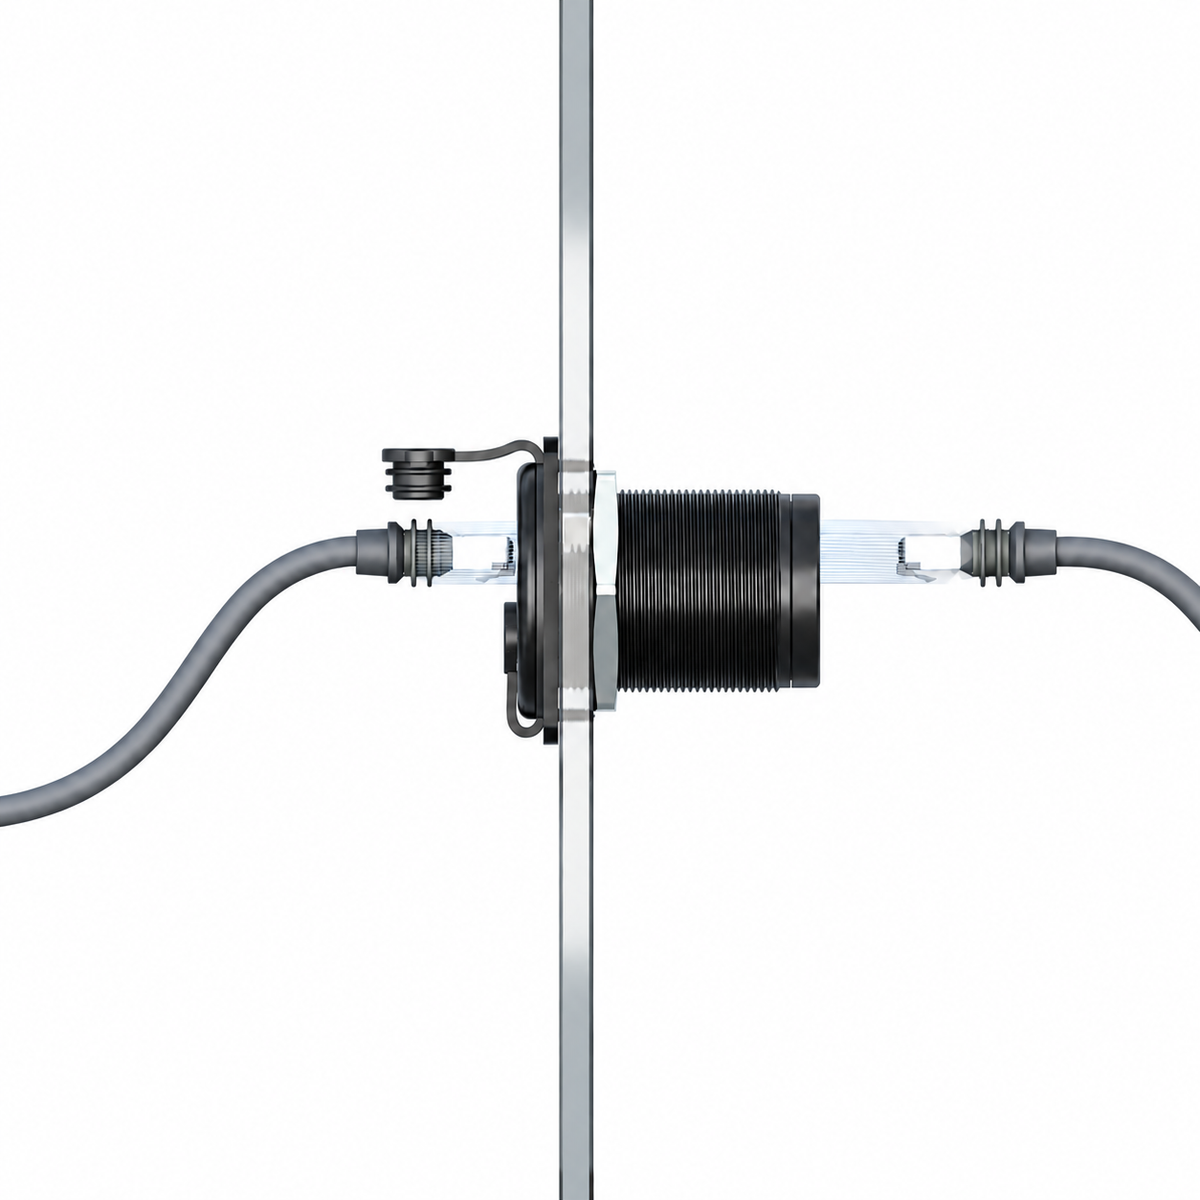
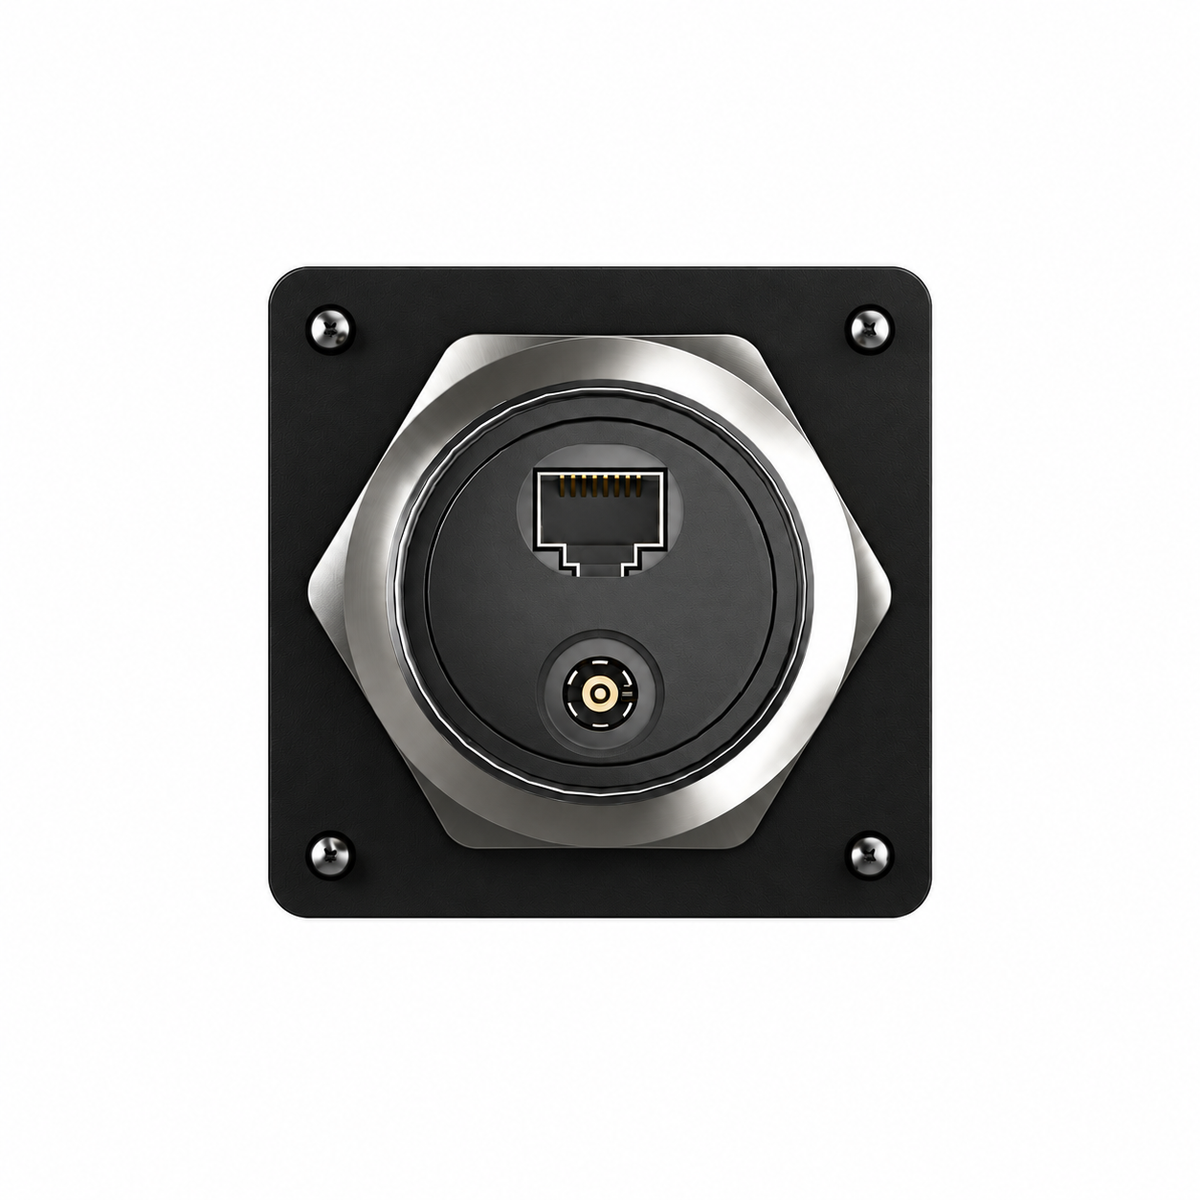
The bulkhead-style design creates an exterior connection point on one side of the wall and corresponding internal ports on the opposite side.
- Exterior RJ45 connection
- Exterior DC connection
- Internal RJ45 pass-through
- Internal DC pass-through

Small Enough for a Clean Install. Large Enough for Two Ports.
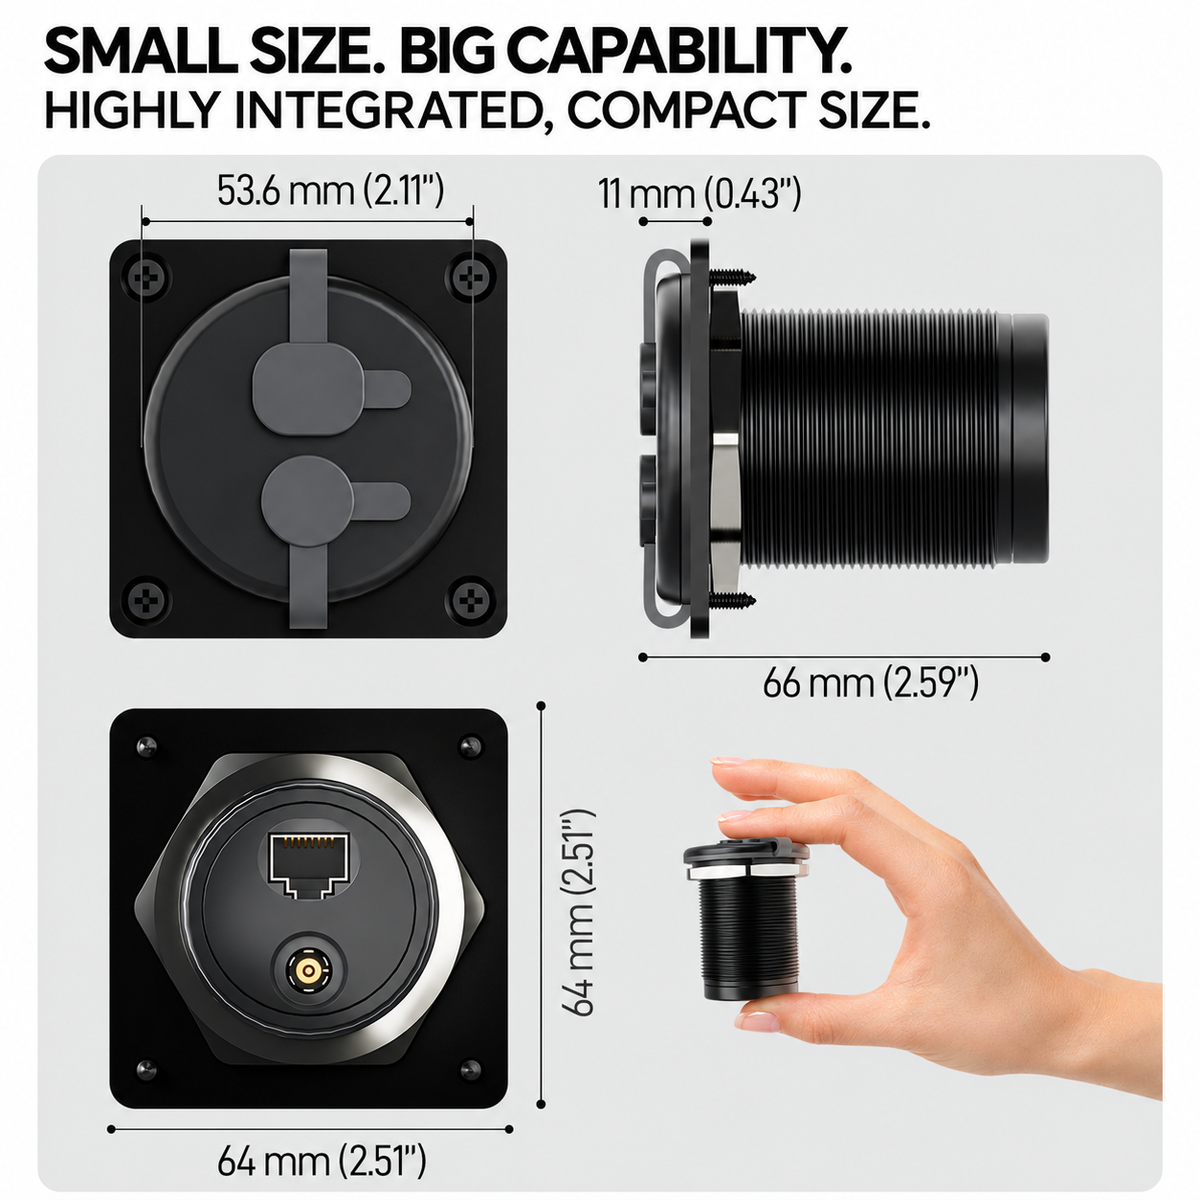
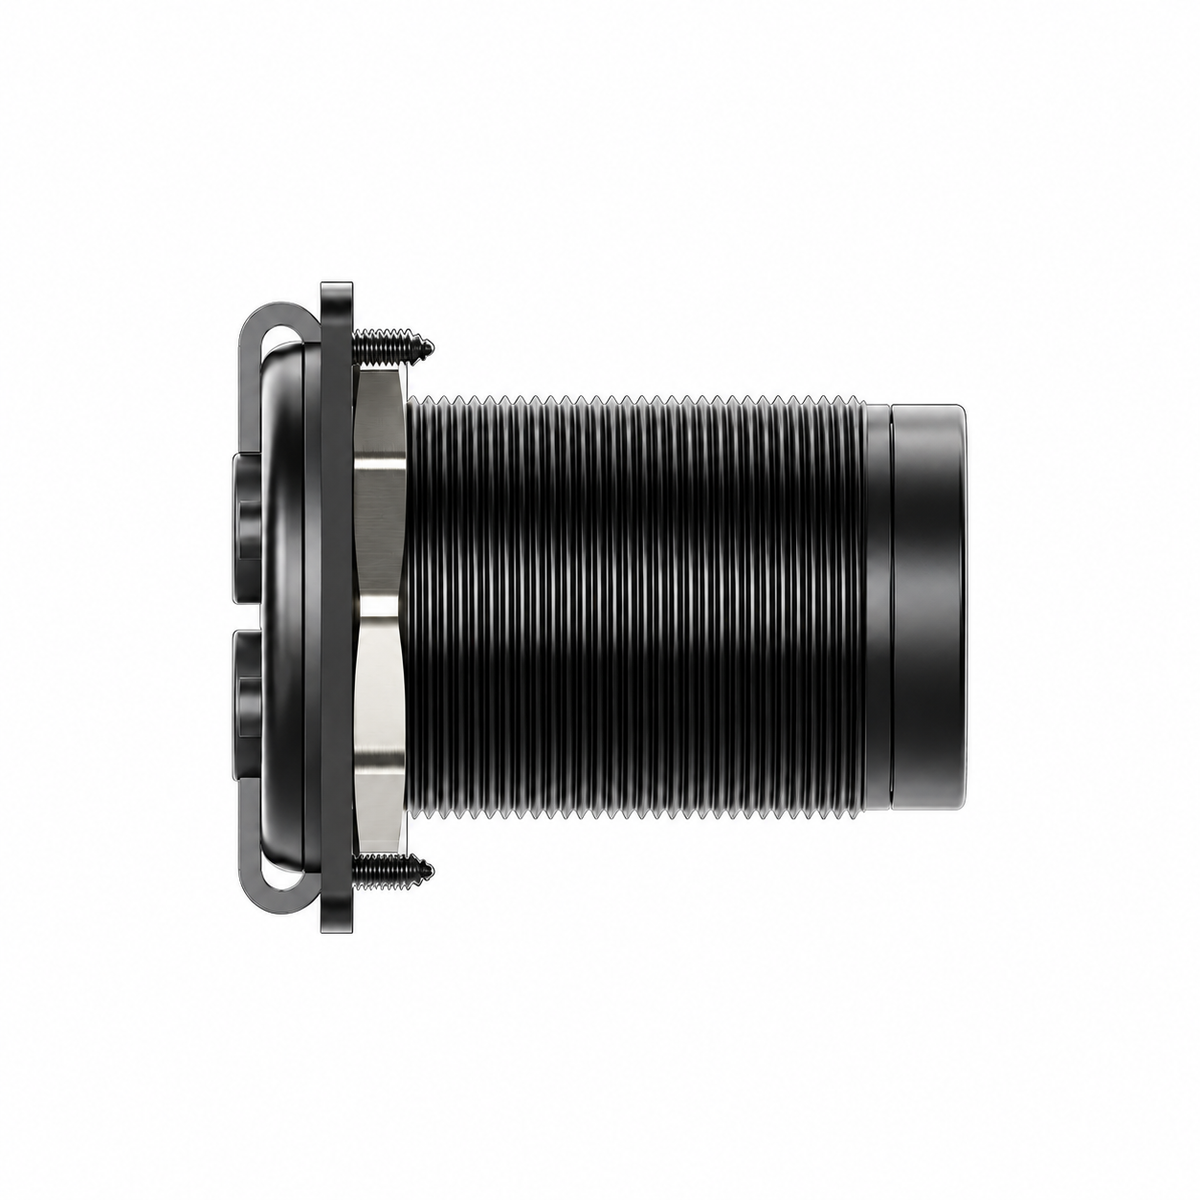
Current product media shows a compact square front panel and threaded bulkhead body for installation through a suitable wall or mounting surface.

Use the Connection Your Starlink Setup Actually Needs
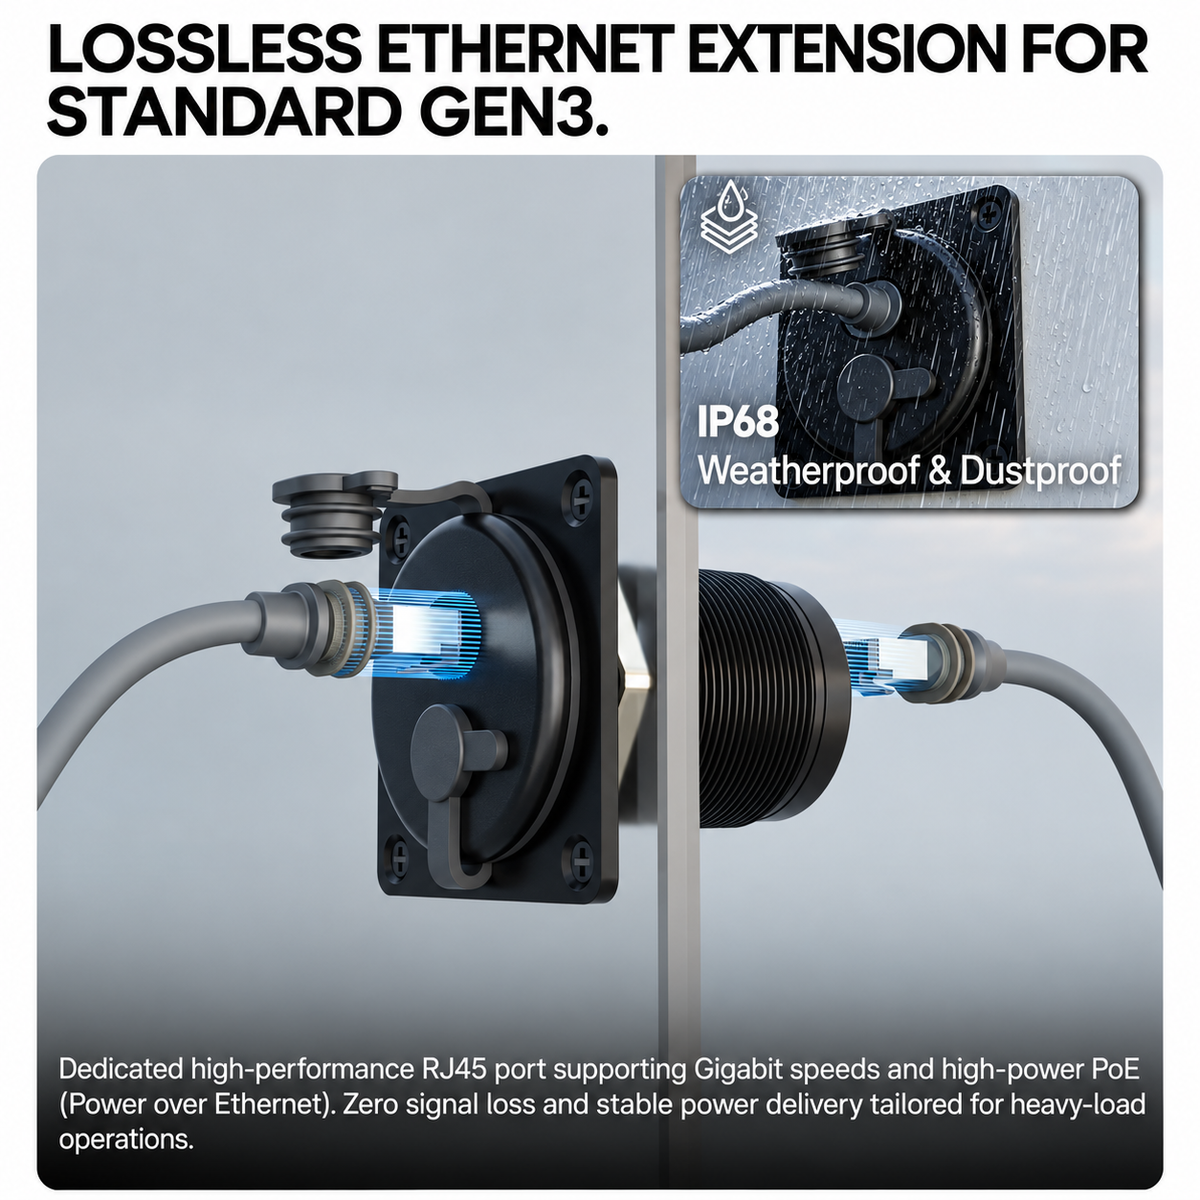
RJ45 Ethernet Port
Designed as a direct Ethernet pass-through for compatible RJ45 cable setups. Network speed and PoE behavior still depend on the connected cables, networking equipment, pinout and Starlink configuration.
DC Power Port
Current product imagery lists a 5.5 × 2.1 mm DC connection. The panel does not regulate or convert voltage, so the connected power source must match the requirements of the Starlink hardware and cable being used.
Keep a Fixed Network Route Through the Vehicle or Enclosure
The RJ45 coupler allows compatible Ethernet cables to connect on both sides of the panel, making it easier to keep the interior cable routing organized between trips.
- Female-to-female RJ45 interface
- Compatible with suitable waterproof Ethernet cables
- Useful for compatible Ethernet / PoE routing
- Actual speed depends on the complete network path

Built for Installations That Face Weather, Dust and Road Travel
Individual covers help shield the RJ45 and DC openings when they are not connected.
The supplied sealing layer sits between the panel and mounting surface as part of the installed interface.
Current product imagery lists IP68 weather and dust protection. Final sealing still depends on correct installation.

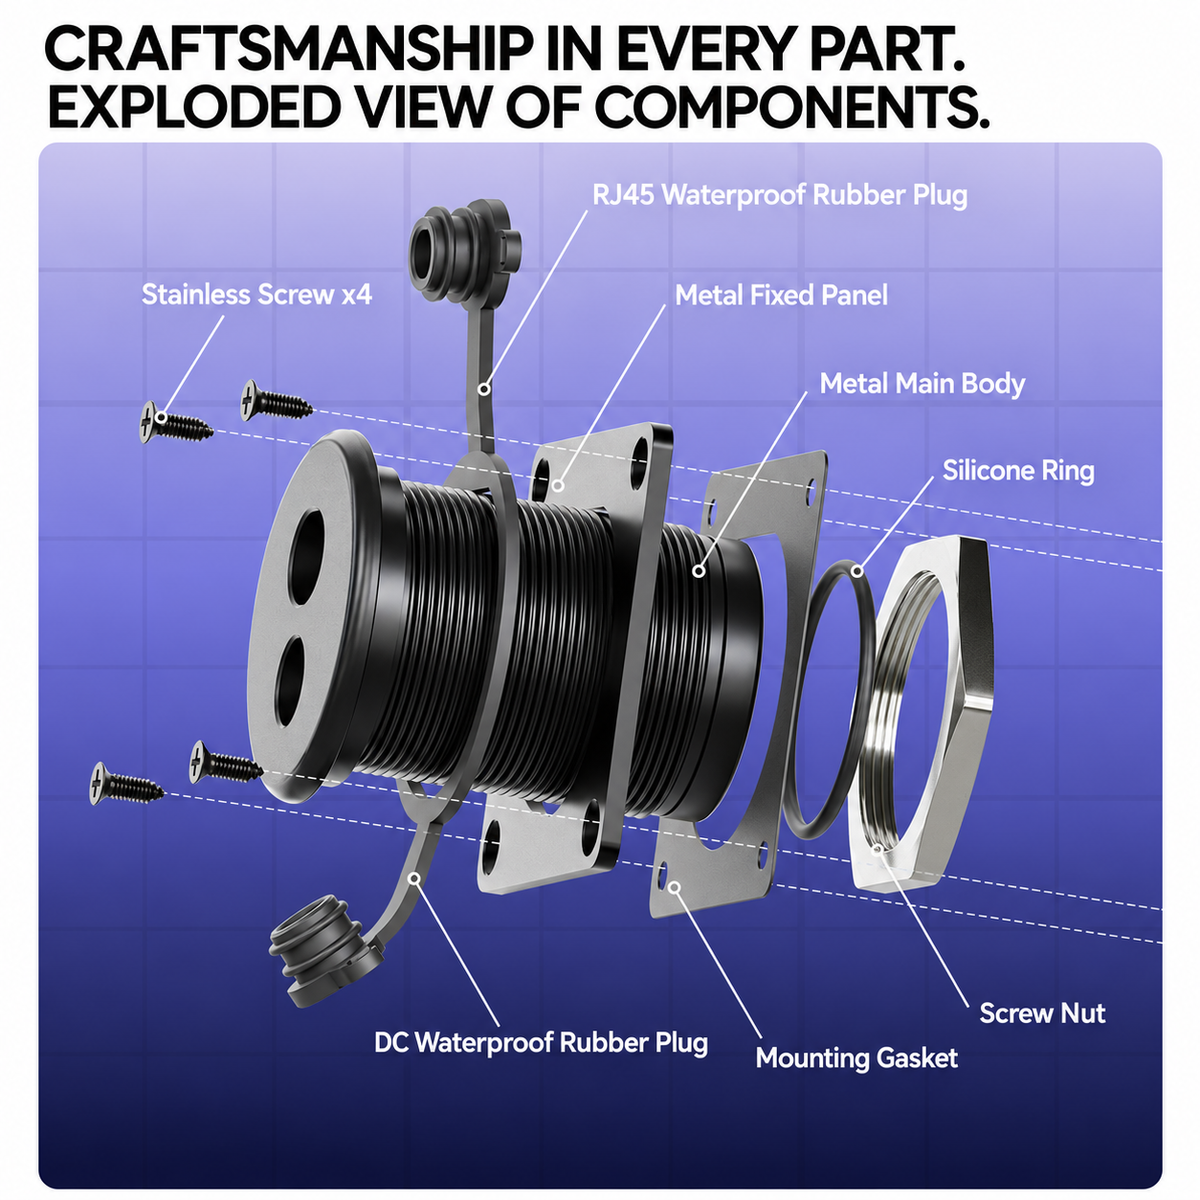
More Than Two Connectors Mounted on a Flat Plate
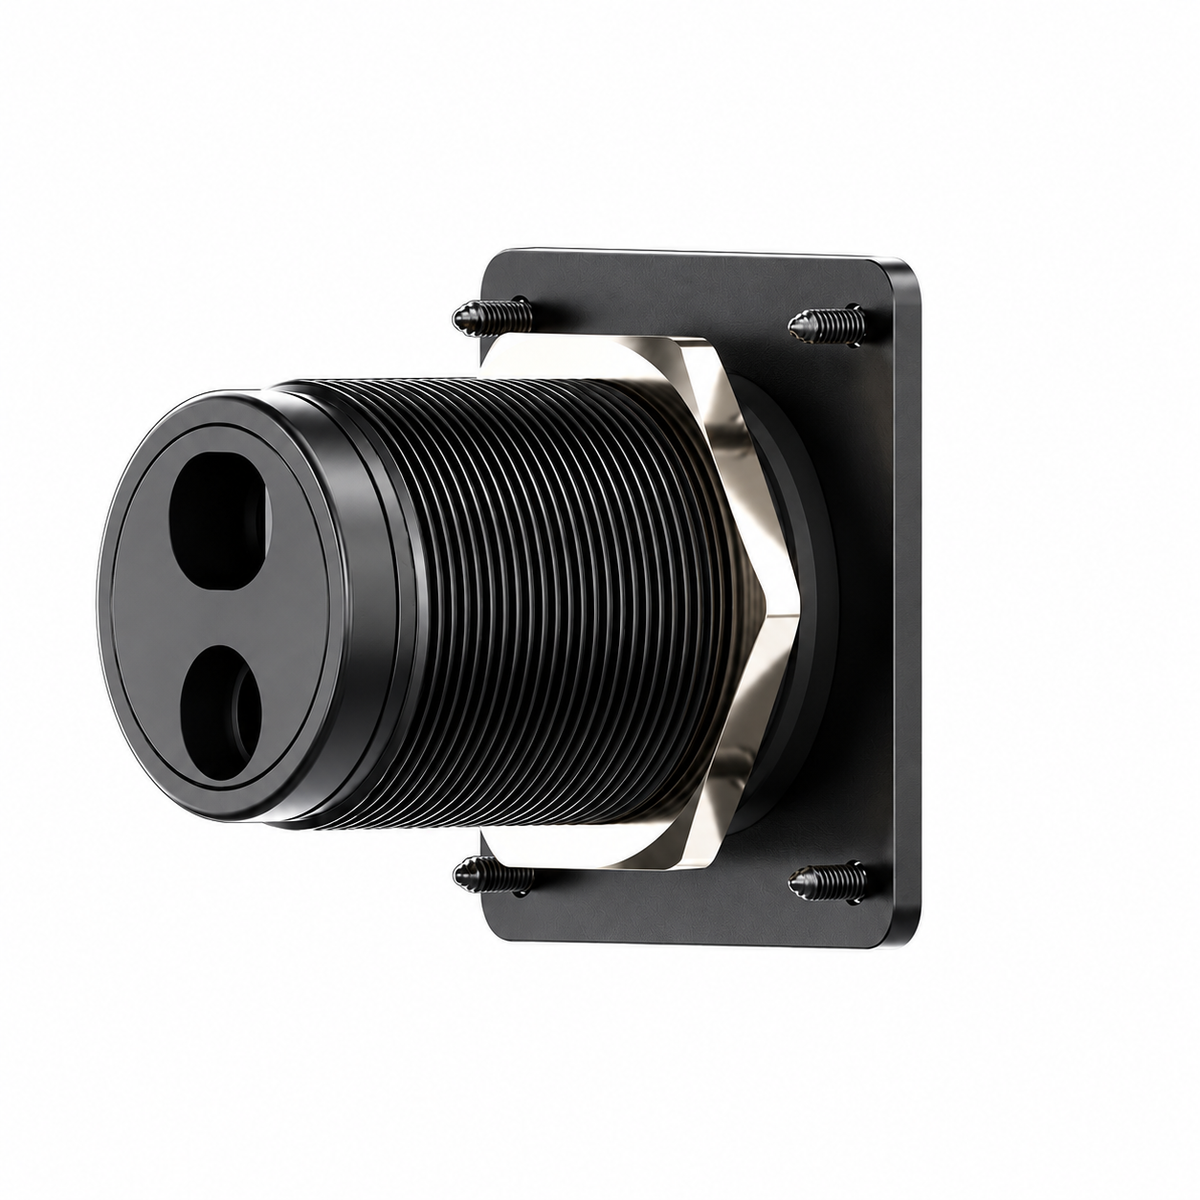
Threaded body passes through the selected mounting surface and supports the internal connection side.
Sealing components help reduce water and dust ingress around the panel when installed correctly.
Rear retaining hardware secures the bulkhead body while front screws stabilize the visible plate.

Create a Cleaner RV or Off-Grid Power and Ethernet Entry Point
For compatible Starlink Mini installations, the two-port layout can place the DC power path and Ethernet path in one compact exterior location instead of using separate cable entries.
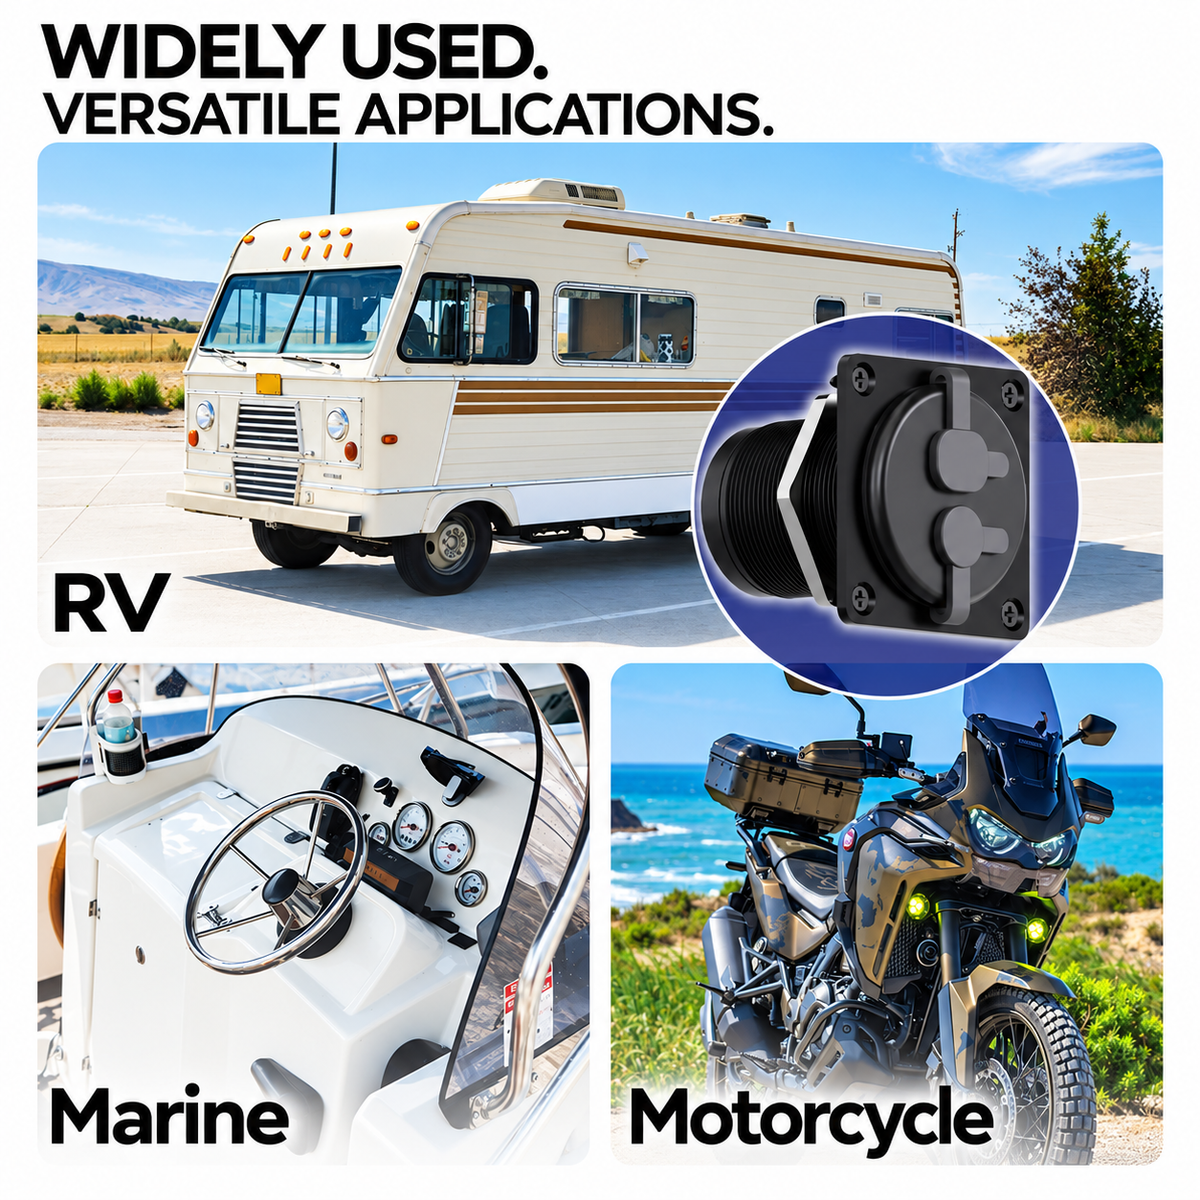
- Useful for RV and camper installations
- Suitable for compatible 5.5 × 2.1 mm DC setups
- Dedicated RJ45 network connection
- Works with the selected compatible cable configuration

Select the Cable Around Your Real Installation — Not the Product Photo
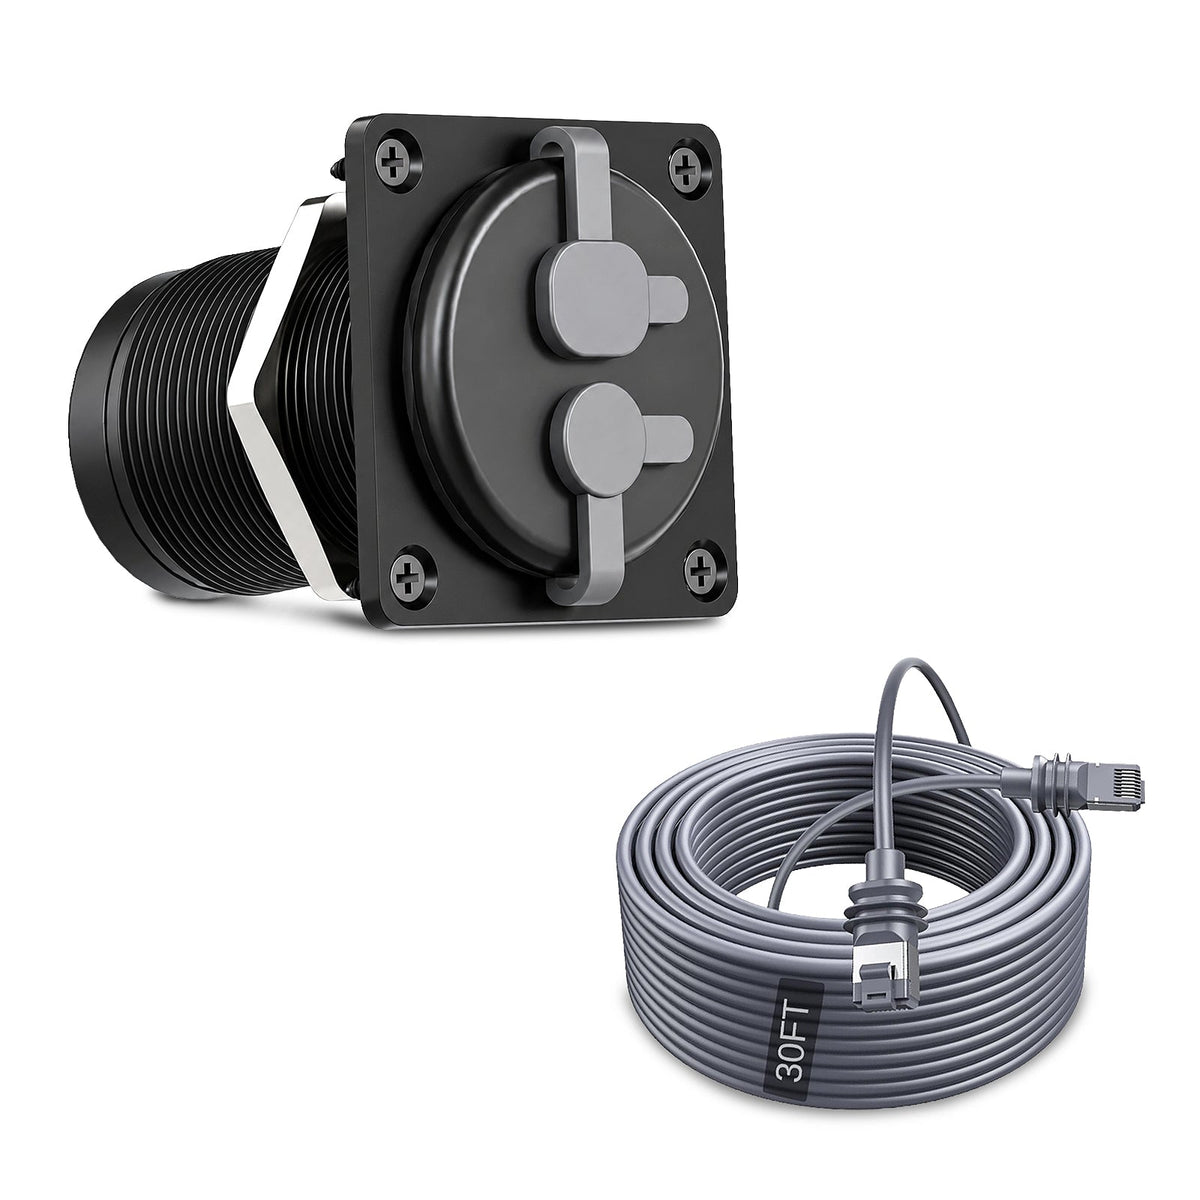
Ethernet, DC-only and combined cable configurations solve different installation needs. Match the selected bundle to the ports and power system you already use.

One Connection Point for Mobile and Outdoor Starlink Setups
Create a dedicated external Starlink connection instead of routing cables through a door or window.
Route power and data through one compact wall location in a purpose-built mobile workspace.
Keep the outside connection accessible while leaving the internal cable path installed between trips.
Useful where a compact sealed pass-through is needed, provided the installation surface and wiring are appropriate.

The Panel Is a Pass-Through — It Does Not Convert Your Power System
Confirm whether your installation is for Starlink Mini or a compatible Gen 3 setup and match the required wiring.
A DC coupler passes the supplied voltage through. Use only a power source appropriate for your Starlink setup.
Network performance depends on the connected cable, connector quality, network hardware and complete cable run.
The panel provides physical pass-through connections. Any required voltage conversion, PoE supply, router, power station or vehicle electrical interface must be provided separately by the compatible Starlink installation.
Measure First. Cut Once. Seal the Mounting Surface Carefully.
This product requires a suitable opening through the selected mounting surface. Confirm dimensions, clearance and cable routing before drilling or cutting.
Choose the Location
Confirm both sides of the wall are clear of wiring, plumbing, framing and moving vehicle components.
Measure & Test-Fit
Measure the actual supplied part rather than relying only on online dimensions before cutting the panel.
Install & Seal
Position the gasket, bulkhead body and retaining hardware so the panel sits flat against the mounting surface.
Test Both Ports
Verify Ethernet communication, DC polarity and correct voltage before connecting the final Starlink equipment.

Weather Resistance Depends on the Entire Installation
The panel includes sealing components, but the final installation is only as weather-resistant as the mounting surface, gasket, fasteners, cable connections and installation workmanship.
Check both sides before drilling into an RV, trailer, van or marine panel.
Confirm connector polarity and voltage before powering any Starlink hardware through the DC port.
Keep unused exterior connections capped to help protect the ports from water, dust and debris.
Keep the Outside Connection Compact When Starlink Is Packed Away
With both covers closed, the panel becomes a small fixed exterior interface rather than leaving loose cable ends hanging outside the vehicle or enclosure.
- Independent RJ45 and DC caps
- Low-profile square faceplate
- Four-point front mounting
- Black finish for a clean utility appearance

Build a Cleaner Starlink Mini Travel Setup
Three complementary products for vehicle power, portable power and mobile Starlink Mini mounting.

3-in-1 Car Charger DC Power Cable
Add a dedicated vehicle-power option for compatible Starlink Mini car, RV and mobile setups.
View product →
Starlink Mini 99Wh Power Bank
Add portable battery power for camping, road trips and temporary off-grid connectivity.
View product →
Heavy-Duty Magnetic Mount
Add a removable magnetic mounting option for compatible steel vehicle and RV surfaces.
View product →Confirm Your Starlink, Cable and Power System First
Send Tesstudio your Starlink version, cable photos, power source and intended mounting location if you are unsure which panel bundle matches your installation.
Contact Tesstudio →Starlink RJ45 + DC Panel Port Questions
What is this 2-in-1 panel used for?
It creates a dedicated wall-mounted pass-through point for compatible RJ45 Ethernet and DC power connections. It is useful for RVs, vans, trailers, enclosures and other mobile Starlink installations.
Is it compatible with Starlink Mini?
The current listing is designed around compatible Starlink Mini setups. Confirm that your DC connector, voltage, polarity and Ethernet cable match the selected installation before ordering.
Is it compatible with Starlink Gen 3?
The listing also positions the RJ45 pass-through for compatible Starlink Gen 3 cable-routing applications. Gen 3 power and networking requirements differ from Starlink Mini, so confirm the complete wiring arrangement first.
What DC connector size does the panel use?
Current product imagery lists a 5.5 × 2.1 mm DC barrel connection. Confirm connector size and polarity against your actual cable before applying power.
Does the DC port convert 12V, 24V, 30V or 48V power?
No. The panel is a pass-through connector and does not regulate or convert voltage. Any required DC-to-DC conversion must be handled by a compatible external power supply or converter.
Can the RJ45 port carry Ethernet and PoE?
The RJ45 interface is designed as a direct cable pass-through and can be used in compatible Ethernet or PoE cable arrangements. Actual operation depends on cable category, pinout, power source and connected hardware.
Will the RJ45 coupler reduce internet speed?
Network performance depends on the complete cable path, cable quality, connector condition, cable length and network equipment. Use suitable Ethernet cables and keep connections clean.
Is the panel waterproof?
Current product imagery lists IP68 weather and dust protection. Final weather resistance depends on correct mounting, gasket compression, cable sealing and keeping unused ports capped.
Can I install it on an RV or camper exterior wall?
Yes, provided the selected location has suitable structure, internal clearance and appropriate sealing. Check for hidden wiring, plumbing and framing before cutting.
Can it be used on boats or marine installations?
The compact sealed design can suit compatible marine or enclosure installations, but the mounting surface, corrosion exposure, cable type and final sealing method must be appropriate for the environment.
What are the approximate panel dimensions?
Current product media shows an approximately 64 × 64 mm front panel and a listed body length of about 66 mm. Measure the actual supplied product before drilling or cutting the final installation opening.
What setup options are available?
The current selector offers Panel Only, With 2-in-1 Power & Ethernet Cable, With Waterproof Cat6 Cable, and With Waterproof Flat DC-to-DC Power Cable.
Are Starlink, the router and power station included?
No. Starlink hardware, router, power station, vehicle and other lifestyle equipment shown in product images are for demonstration only. Included cable components depend on the selected bundle.
What should I check before cutting the installation hole?
Confirm the actual product dimensions, wall thickness, rear clearance, cable bend radius, hidden wiring, plumbing and structural members before drilling or cutting.
What should I test before connecting Starlink?
Check DC voltage and polarity first, then verify Ethernet continuity and cable fit. Do not connect expensive network hardware until the complete wiring path has been verified.
Q&A
We provide assistance through email, live chat, and detailed installation guides. Additionally, we offer step-by-step tutorial videos featuring influencers to help you with the process.
We offer a one-year warranty (two years for some products).
Yes, the product can be removed after installation without affecting the original wiring harness of the vehicle.
We offer free returns and exchanges if there are any quality issues with the product upon receipt by the customer.

Subscribe
Join Us - Enjoy our latest news and exclusive discounts & gifts.