



Starlink Mini Low-Profile Magnetic Base Mount

Check the selected Tesla model, model year, and option before checkout. If this product has a Car Model or Compatible Model selector, choose the option that matches your vehicle.
- Use the product images and variant name to confirm the correct version.
- If you are unsure about fitment, contact Tesstudio with your Tesla model and production year before ordering.
Tesstudio installation support is available for Tesla owners who need help choosing, installing, or troubleshooting accessories.
Most Tesstudio accessories are designed for straightforward DIY installation. For powered upgrades, wiring, lighting, or large exterior parts, professional installation may be recommended.
Local installation and technical support
- Address: 14761 Franklin Ave # G, Tustin, CA 92780
- Technical support: +1 (657) 543-9876 or +1 (657) 565-1007
- Support hours: Monday-Friday, 8:30 AM-5:30 PM
The phone numbers above are for technical installation support only. For orders, shipping, returns, or general customer service, contact:
- Email: support@tesstudio.com
- WhatsApp: +1 714 317 9647
Tesstudio checks fit, material, and daily-use durability before listing products for Tesla owners.
- Eligible products include warranty support for non-human damage issues.
- If a product arrives damaged or does not fit as expected, keep the packaging and contact us with photos so we can help quickly.
In-stock items are usually processed within 1-2 business days. Delivery time depends on destination, product size, and stock status.
- Orders over $99 qualify for free standard shipping where available.
- Oversized, remote-area, pre-order, and special-market items follow the terms shown on the product page.
- Tracking is provided after dispatch.
Need help before or after purchase?
Contact Tesstudio support:
WhatsApp
+1 714 317 9647
Choose options
Mount Starlink Mini on a Compatible Steel Roof Without Drilling
A low-profile four-magnet mounting base designed specifically for Starlink Mini. Create a removable vehicle, RV or mobile installation without adding permanent roof holes or bulky rack hardware.

Skip the Roof Holes When a Strong Steel Surface Is Already Available
Drilling Makes a Temporary Starlink Setup Permanent
Fixed roof hardware can require holes, sealant, permanent brackets and more installation work than many travel or occasional-use Starlink Mini setups actually need.
Place, Check and Remove the Mount Without Drilling
Four magnetic bases attach to a compatible ferromagnetic steel surface, allowing the Mini to be installed or removed without modifying the roof with permanent mounting holes.
Low Profile Outside. Simple Hardware Under the Mini.
Four Magnetic Points
Four separate magnetic bases distribute attachment points around the mounting frame.
No Roof Drilling
Magnetic attachment avoids permanent holes when used on a suitable steel mounting surface.
Low-Profile Position
Keeps Starlink Mini close to the mounting surface instead of raising it on a tall stand.
Removable Setup
Lift the assembly off when the Mini needs to be stored, transferred or used somewhere else.
Spread the Holding Force Across Four Corners
Each corner of the mounting plate has its own magnetic contact point instead of relying on one central magnet.
The rectangular layout spreads the contact points around the Starlink Mini footprint.
The roof connection itself does not require drilling or permanent attachment to compatible steel.
Aluminum, fiberglass, glass, plastic and many composite RV or boat roofs will not provide magnetic holding force. Test the exact mounting surface before relying on the mount.
Current Product Media Lists Up to 176 lb Vertical Pull
The current product imagery demonstrates a listed maximum vertical pulling force of 176 lb under the illustrated static test setup.
- Four magnetic contact points
- Static vertical-pull demonstration
- Holding force depends on the actual steel surface
- Not the same as a certified vehicle-speed or wind-load rating

A Simple Mechanical Mount Built Around Starlink Mini
Compatibility depends on both the Starlink terminal and the material of the surface underneath the mount.
The Roof Material Matters as Much as the Mount
Suitable when the panel is genuinely ferromagnetic steel and all four magnets can sit flat.
Can be suitable when the exterior skin is steel rather than aluminum or fiberglass.
A clean flat ferromagnetic panel can provide another removable mounting location.
Only use where the actual mounting surface is compatible magnetic steel and the environment is appropriate.
Use the Mount Wherever Four Magnets Can Fully Contact Suitable Steel
Vehicle, RV and marine installations can use very different roof materials. Always verify the exact panel rather than assuming an entire vehicle is magnetic.
- Check the mounting surface with a magnet first
- Use a flat area large enough for all four bases
- Avoid seams, ridges, trim and strongly curved surfaces
- Keep the magnetic contact surfaces clean

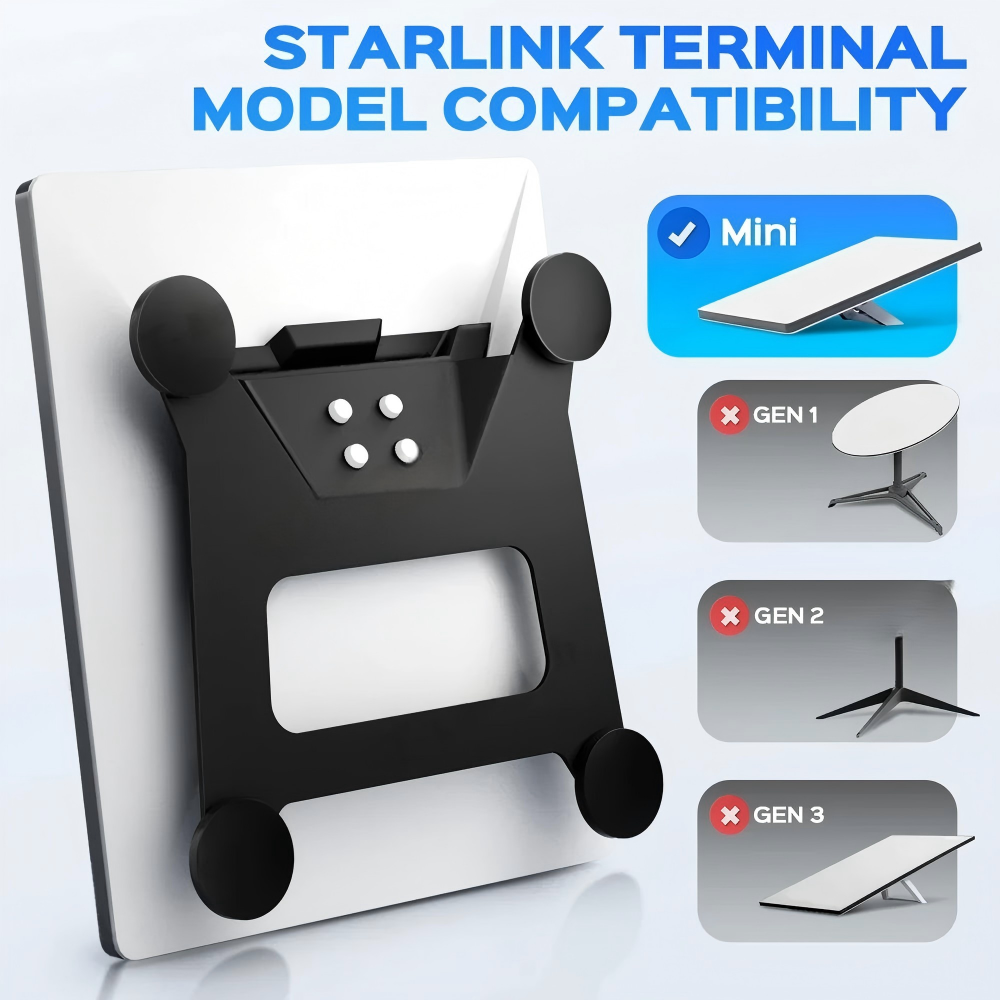
Designed for Starlink Mini — Not Every Starlink Terminal
The mount cradle and footprint are designed around Starlink Mini. Current product imagery specifically marks Gen 1, Gen 2 and Gen 3 terminals as incompatible.
The mounting cradle is shaped around the Starlink Mini terminal shown in the listing.
Different terminal shape, dimensions and mounting architecture.
Different actuated-dish form factor and mounting requirements.
Different Standard-terminal dimensions and mounting interface.

Assemble the Mini First. Clean the Roof Before the Magnets Touch It.
Dirt trapped between a magnetic base and painted steel can reduce holding performance and may mark the finish. Clean both surfaces before every installation.
Assemble the Mount
Attach the Starlink Mini cradle and magnetic bases to the metal mounting frame.
Check the Roof Material
Confirm the exact intended location is magnetic steel before positioning the mount.
Clean Both Surfaces
Remove dust, grit, wax buildup and loose debris from the roof and magnetic bases.
Position & Pull-Test
Place all four magnets flat on the steel, then gently test the complete assembly before use.

Built for Travel — but Still Inspect It Like Exterior Hardware
The current product media promotes the coated metal mount for outdoor use. Like any exterior mounting hardware, regular cleaning and inspection help maintain both the mount and the surface underneath it.
- Coated black metal frame
- Outdoor-oriented mounting hardware
- Keep magnetic contact areas clean and dry when stored
- Inspect fasteners and bases regularly

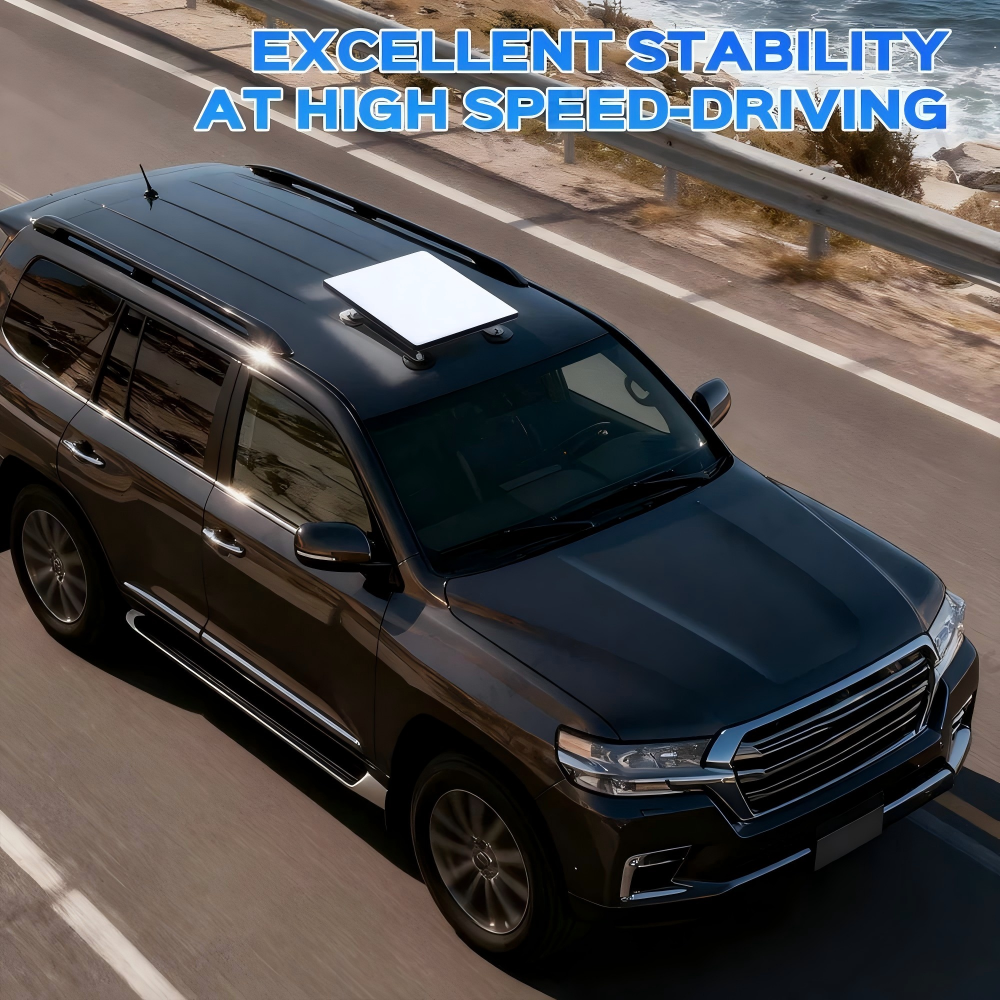
Magnetic Pull Strength Is Not the Same as a Guaranteed Driving-Speed Rating
Real exterior loads change with vehicle speed, wind direction, turbulence, road vibration, roof curvature, temperature and the amount of actual magnet-to-steel contact.
Confirm all four magnetic bases are fully seated and the Starlink Mini is securely retained in the cradle.
Recheck the mount after rough roads, strong wind, severe weather or significant temperature changes.
For exterior mobile use, use an appropriate secondary retention method whenever the application or local rules require it.
Keep Starlink Mini Close to the Roof Surface
The broad flat mounting plate places Starlink Mini close to the roof instead of lifting the terminal on a tall pole or tripod.
- Low overall mounting height
- Broad four-point footprint
- Simple black utility appearance
- No large external rack required
Keep Grit Out From Between the Magnet and the Paint
Remove sand, dust and road debris before placing the mount on painted steel.
Wipe the magnetic contact surfaces before every reinstall to reduce trapped abrasive particles.
Do not install over damaged paint, loose film or heavily contaminated surfaces.
Clean and dry the mount before storage after rain, salt exposure or extended outdoor use.
Complete the Starlink Mini Vehicle Setup
Three complementary power products for road trips, RV use and portable off-grid Starlink Mini connectivity.

Starlink Mini 99Wh Power Bank
Add portable battery power for camping, road trips and temporary off-grid Starlink Mini use.
View product →
3-in-1 Starlink Mini Car Charger Cable
Add a dedicated vehicle-power option for compatible car, RV, truck and mobile Starlink Mini setups.
View product →
12/24V to 30V 3.5A Power Converter
Create a regulated Starlink Mini DC power path from compatible RV, truck, marine or battery systems.
View product →Confirm the Roof Is Magnetic Steel Before Ordering
Send Tesstudio your Starlink model and a photo of the intended mounting surface if you are unsure whether the roof material is suitable for this magnetic mount.
Contact Tesstudio →Starlink Mini Magnetic Mount Questions
Which Starlink model does this magnetic mount fit?
This mount is designed for Starlink Mini. Current compatibility imagery marks Starlink Gen 1, Gen 2 and Gen 3 terminals as incompatible with this mount.
How many magnets does the mount use?
The mount uses four separate magnetic bases positioned around the corners of the low-profile metal mounting frame.
Does installation require drilling?
No drilling is required to attach the magnetic bases to a compatible ferromagnetic steel surface. The Starlink Mini still needs to be assembled correctly to the mounting cradle and frame.
Will the mount stick to any vehicle roof?
No. Magnetic mounting requires ferromagnetic steel. Aluminum, fiberglass, glass, plastic and many composite roof panels will not provide magnetic holding force. Test the actual intended location before use.
Can it be used on an RV roof?
Yes only when the intended RV mounting area is suitable flat magnetic steel. Many RV roofs use aluminum, fiberglass or composite construction, so verify the material before ordering.
Can it be used on a boat?
It may be used on a suitable ferromagnetic steel mounting surface. Aluminum and fiberglass boat roofs will not hold a magnetic mount.
What does the 176 lb pulling-force claim mean?
Current product imagery lists a maximum vertical pulling force of 176 lb in the illustrated static demonstration. That figure should not be interpreted as a certified vehicle-speed, wind-load or crash rating.
Can I drive with Starlink Mini mounted on the roof?
Exterior attachment loads vary with vehicle speed, wind, roof shape, steel thickness, paint condition, road vibration, weather and actual magnet contact. Inspect the complete installation before vehicle movement and follow local laws and Starlink service requirements.
Is there a guaranteed safe maximum driving speed?
Do not treat static magnet pull force as a universal safe-speed rating. Actual aerodynamic and vibration loads vary by vehicle and installation, so there is no single speed that can be safely inferred from the magnet pull-force image.
Should I use a secondary safety tether?
For exterior moving-vehicle installations, secondary retention can provide an additional layer of protection where appropriate. It should be attached only to suitable secure points and should not interfere with vehicle operation.
Will the magnetic mount scratch vehicle paint?
Dirt, sand or metal particles trapped between any magnetic mount and painted bodywork can mark the finish. Clean the roof and magnetic contact surfaces carefully before each installation and removal.
Can I place the magnets across roof seams or trim?
No. All four magnetic bases should sit fully and evenly on compatible steel. Avoid seams, trim strips, strongly curved edges and locations where part of a magnet is unsupported.
Is the mount waterproof?
The mount is mechanical exterior hardware rather than an electrical enclosure. Current product imagery promotes corrosion-resistant outdoor use, but the hardware should still be cleaned and inspected after rain, road salt or extended outdoor exposure.
Does the mount include Starlink Mini?
No. Starlink Mini, vehicles, RVs, boats and other lifestyle equipment shown in the product imagery are for demonstration only. This listing is for the magnetic mounting hardware.
Does the mount provide power to Starlink Mini?
No. This is a mechanical mounting system only. Starlink Mini still requires a compatible power source and power cable purchased or supplied separately.
What should I inspect before every use?
Check all four magnets, mounting bolts, Starlink Mini cradle, roof surface and cable routing. Stop using the mount if any magnet, fastener or frame component is damaged, loose or no longer seating correctly.
Q&A
We provide assistance through email, live chat, and detailed installation guides. Additionally, we offer step-by-step tutorial videos featuring influencers to help you with the process.
We offer a one-year warranty (two years for some products).
Yes, the product can be removed after installation without affecting the original wiring harness of the vehicle.
We offer free returns and exchanges if there are any quality issues with the product upon receipt by the customer.

Subscribe
Join Us - Enjoy our latest news and exclusive discounts & gifts.