Starlink Mini Windshield Suction Cup Mount Base with Crossbar and Black Anti-Glare Cloth
15%OFF
US$59+18%OFF
US$159+20%OFF
US$299+

안녕하세요,
2 영업일 이내에 답변을 받지 못하셨다면, 지연에 대해 진심으로 사과드립니다.
더 빠른 답변을 원하시면 WhatsApp (+1 (626) 412-7352 , +86 191 2063 1131 또는 +86 190 2201 1181) 으로 문의해 주세요. 위 번호로 직접 문자 메시지를 보내주셔도 됩니다.
귀하의 인내와 이해에 감사드립니다!
귀찮으시다면, "Tesstudio 공식 설치 서비스"를 위해 남부 캘리포니아 공식 매장을 방문하세요. 저희 전문가가 귀하의 Tesla 액세서리를 완벽하게 설치해 드립니다.
주소:
14761 Franklin Ave unit G, Tustin, CA 92780, 미국
친절히 알려드립니다: 저희는 제품 판매를 전문으로 하며, 전문가에게 설치를 의뢰하실 것을 권장합니다. 부적절한 설치로 인해 발생한 문제는 애프터서비스에 포함되지 않습니다. 양해해 주셔서 감사합니다.
1년 보증을 제공합니다. (인적 손상이 아닌 제품 문제에 대해서는 1년간 애프터 서비스를 제공합니다.)
모든 주문은 FedEx, USPS, UPS, SF Express 등 신뢰할 수 있는 운송업체를 통해 배송됩니다.
모든 주문에 무료 배송 혜택을 누리세요! 재고가 있는 상품은 1~2 영업일 이내에 처리 및 발송되며, 미국 국내 배송은 일반적으로 2~9 영업일이 소요됩니다.
사전 주문 상품이나 일시적으로 품절된 상품의 경우, 배송은 상품 페이지에 제공된 기간에 따라 진행됩니다.
옵션 선택
Tesstudio Starlink Mini Windshield Suction Mount Kit
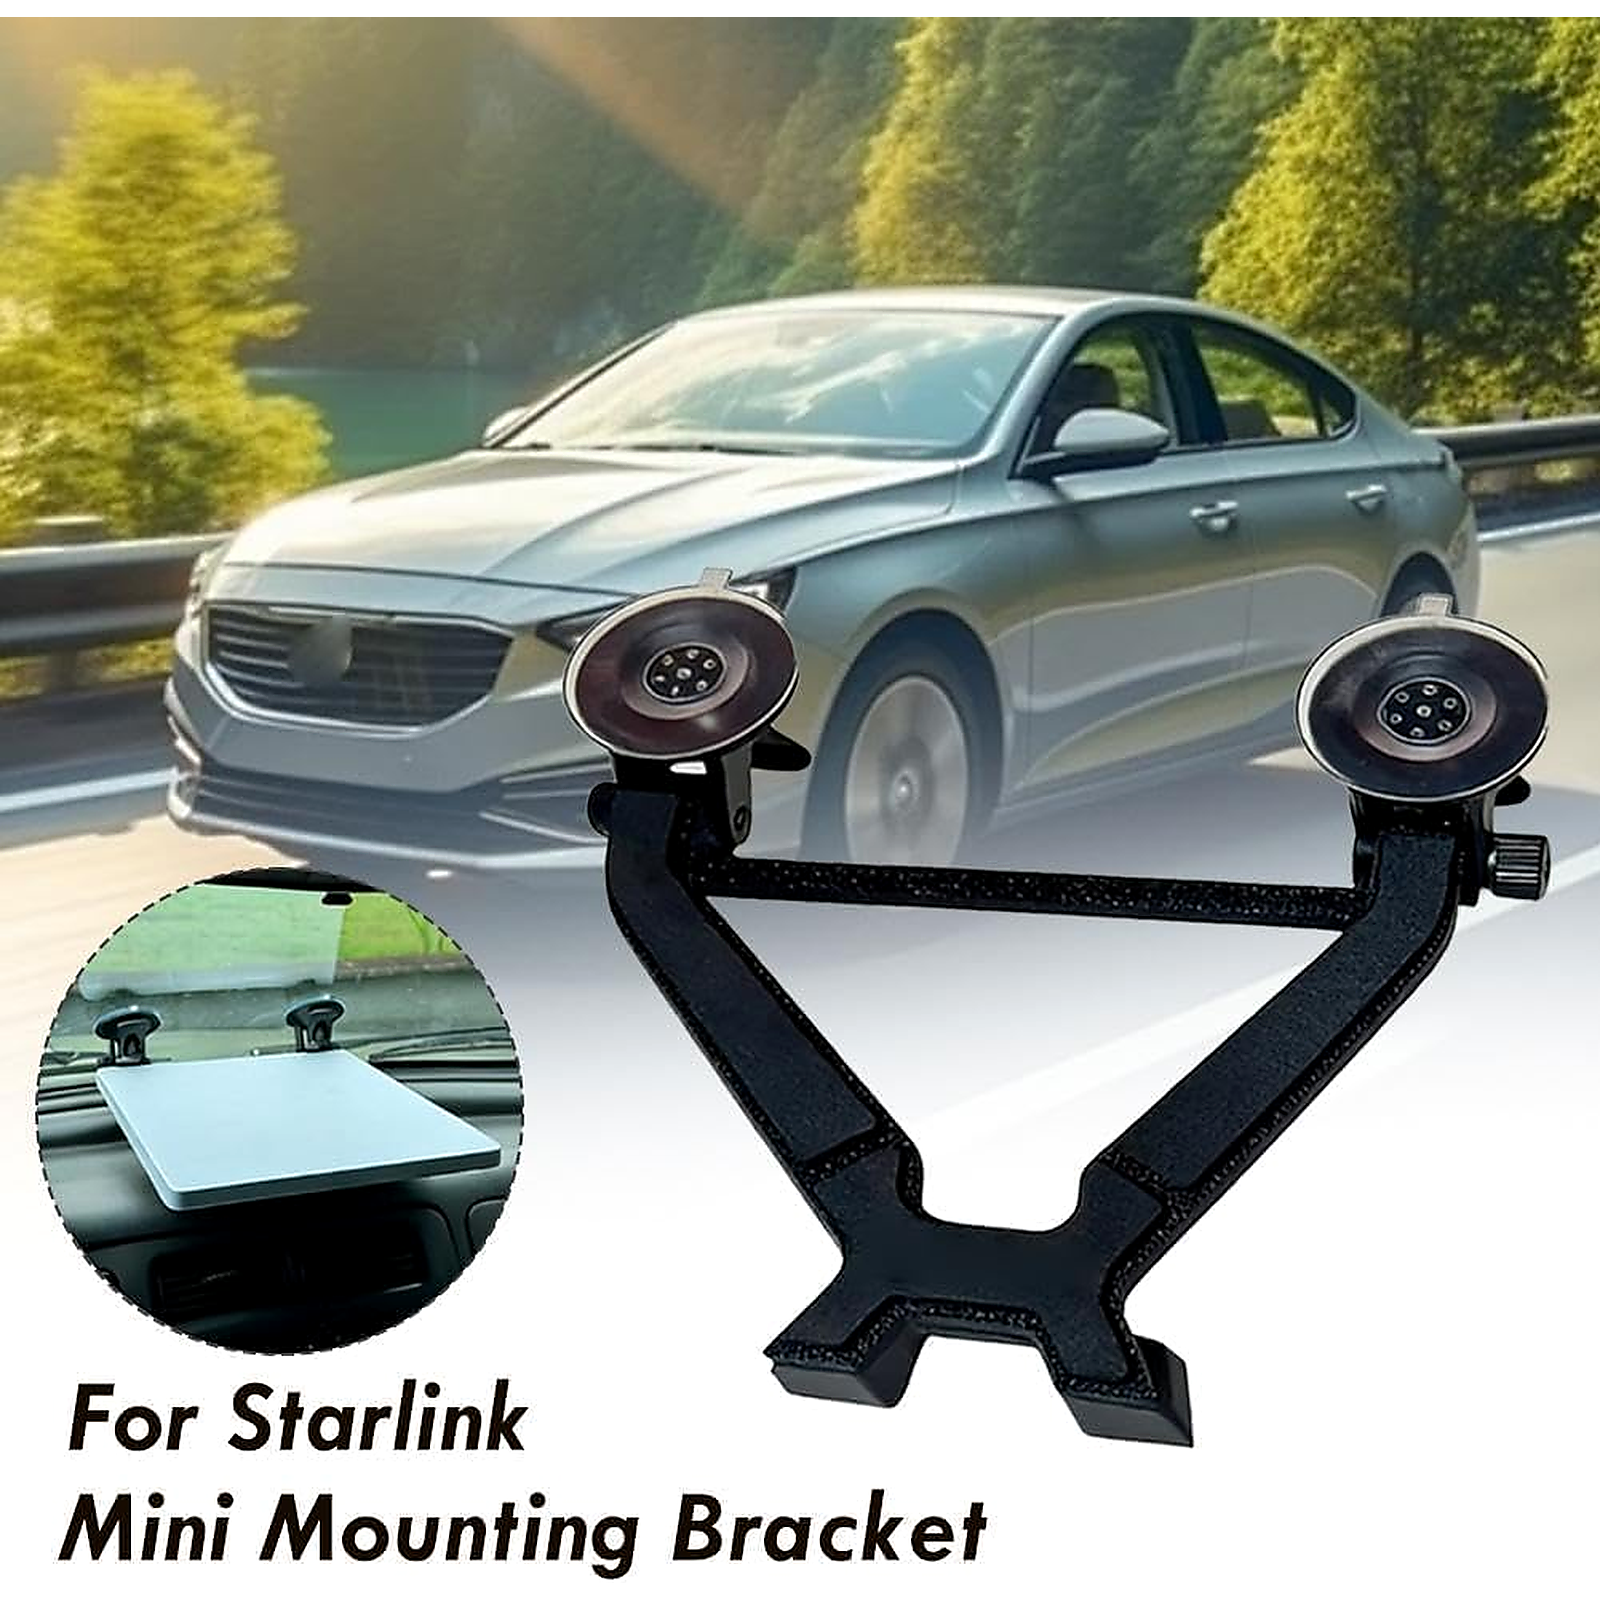
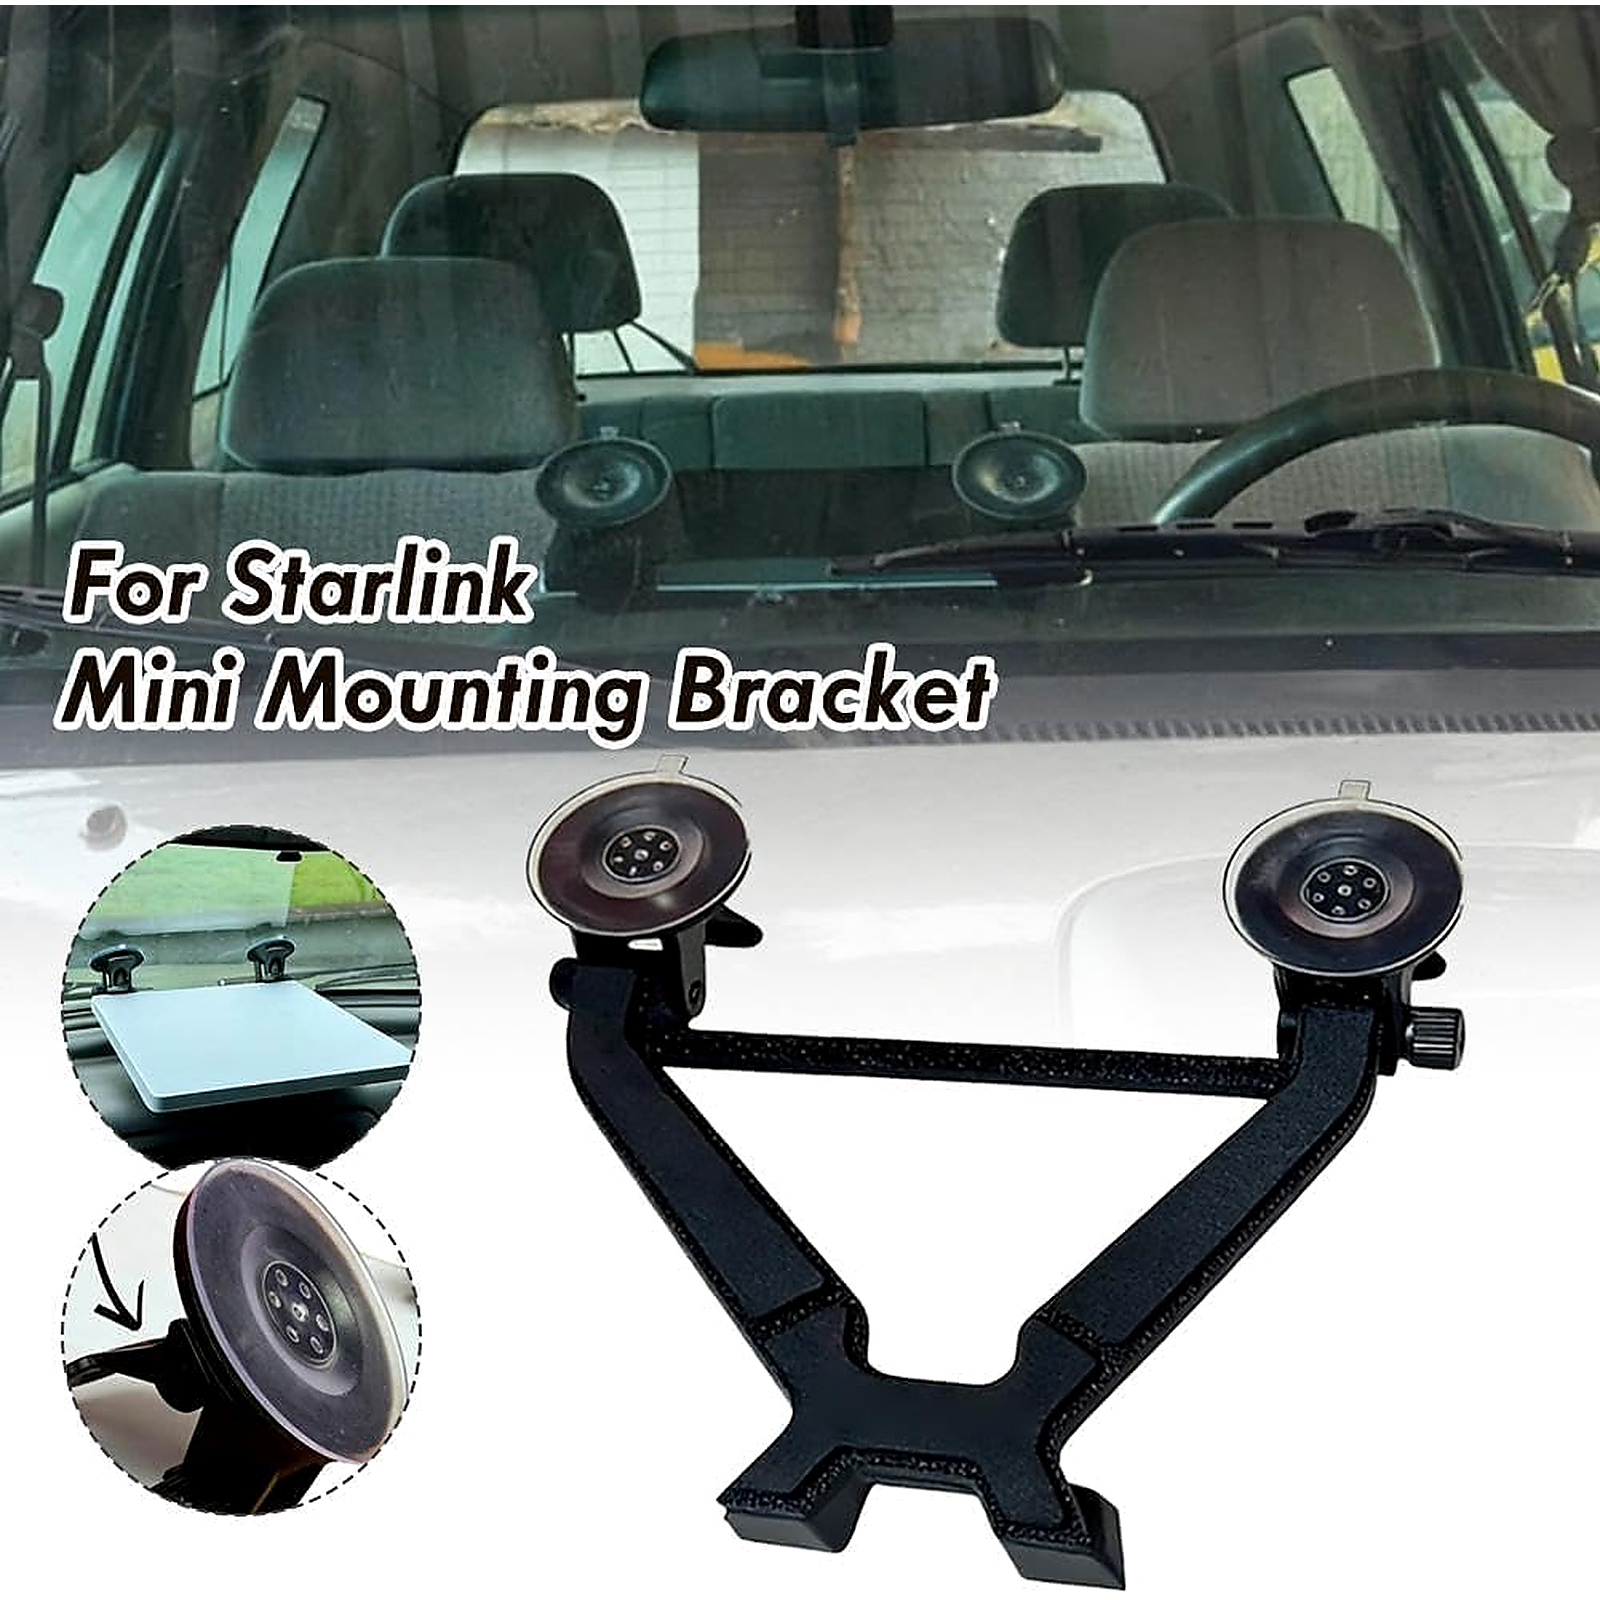
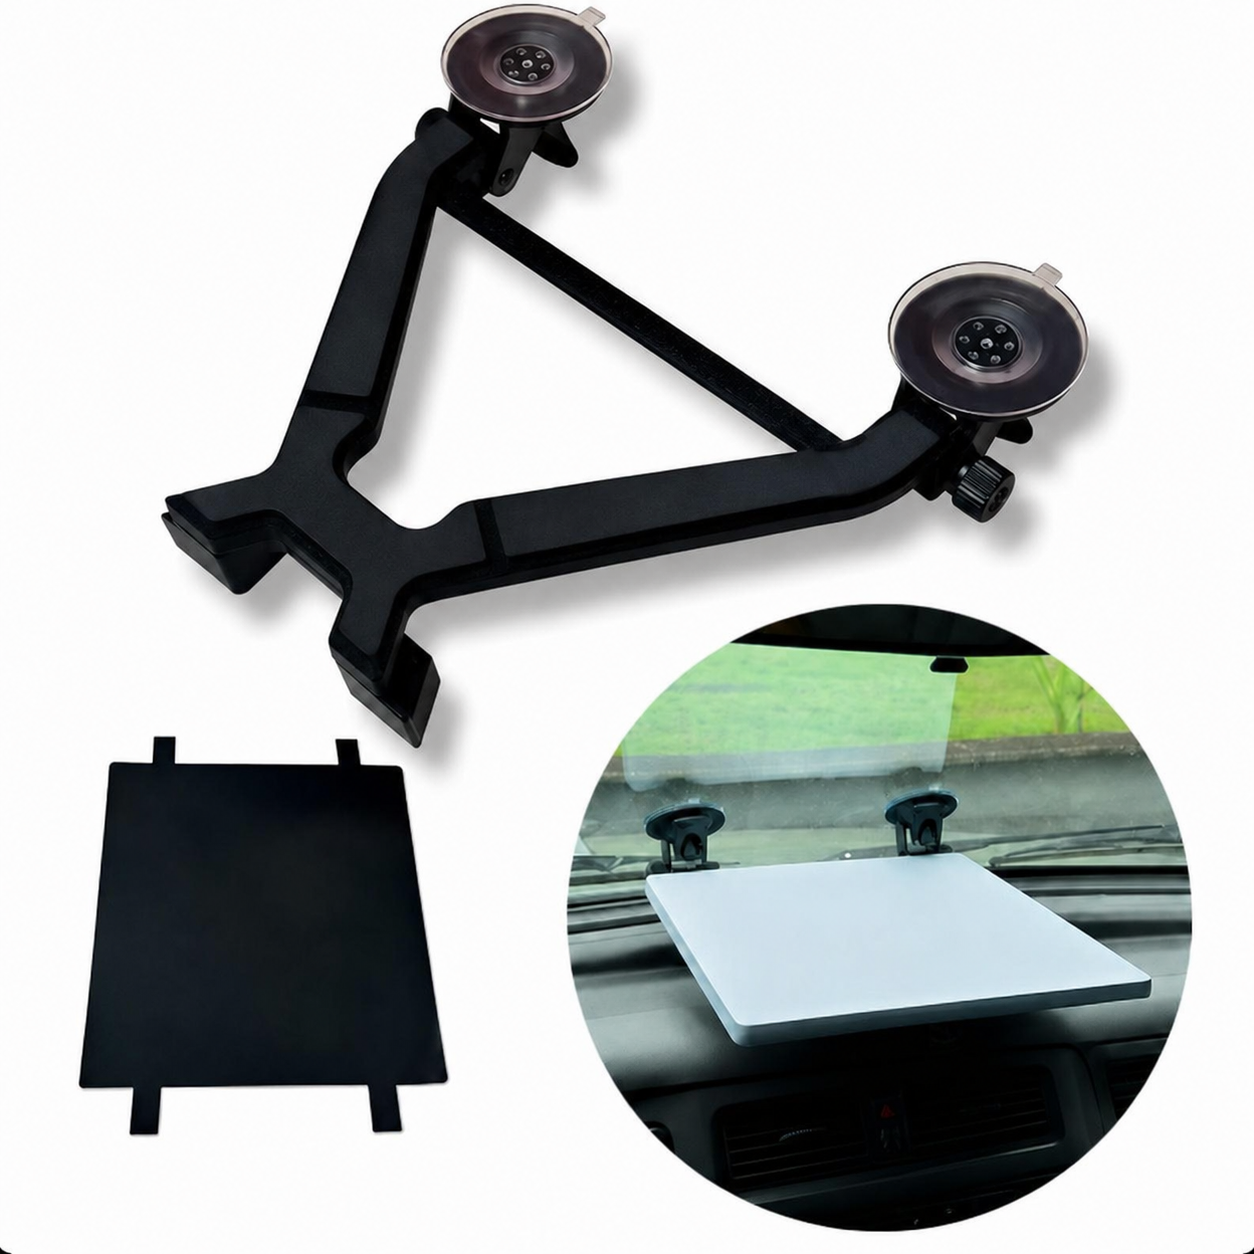
Set up your Starlink Mini inside a compatible vehicle windshield with a dual suction cup crossbar mount, bottom support base and black anti-glare cloth. Designed for parked RV, van, SUV, camping, road-trip rest stop and outdoor work setups, it helps position Starlink Mini near the windshield while keeping the installation removable and no-drill.
Key Features
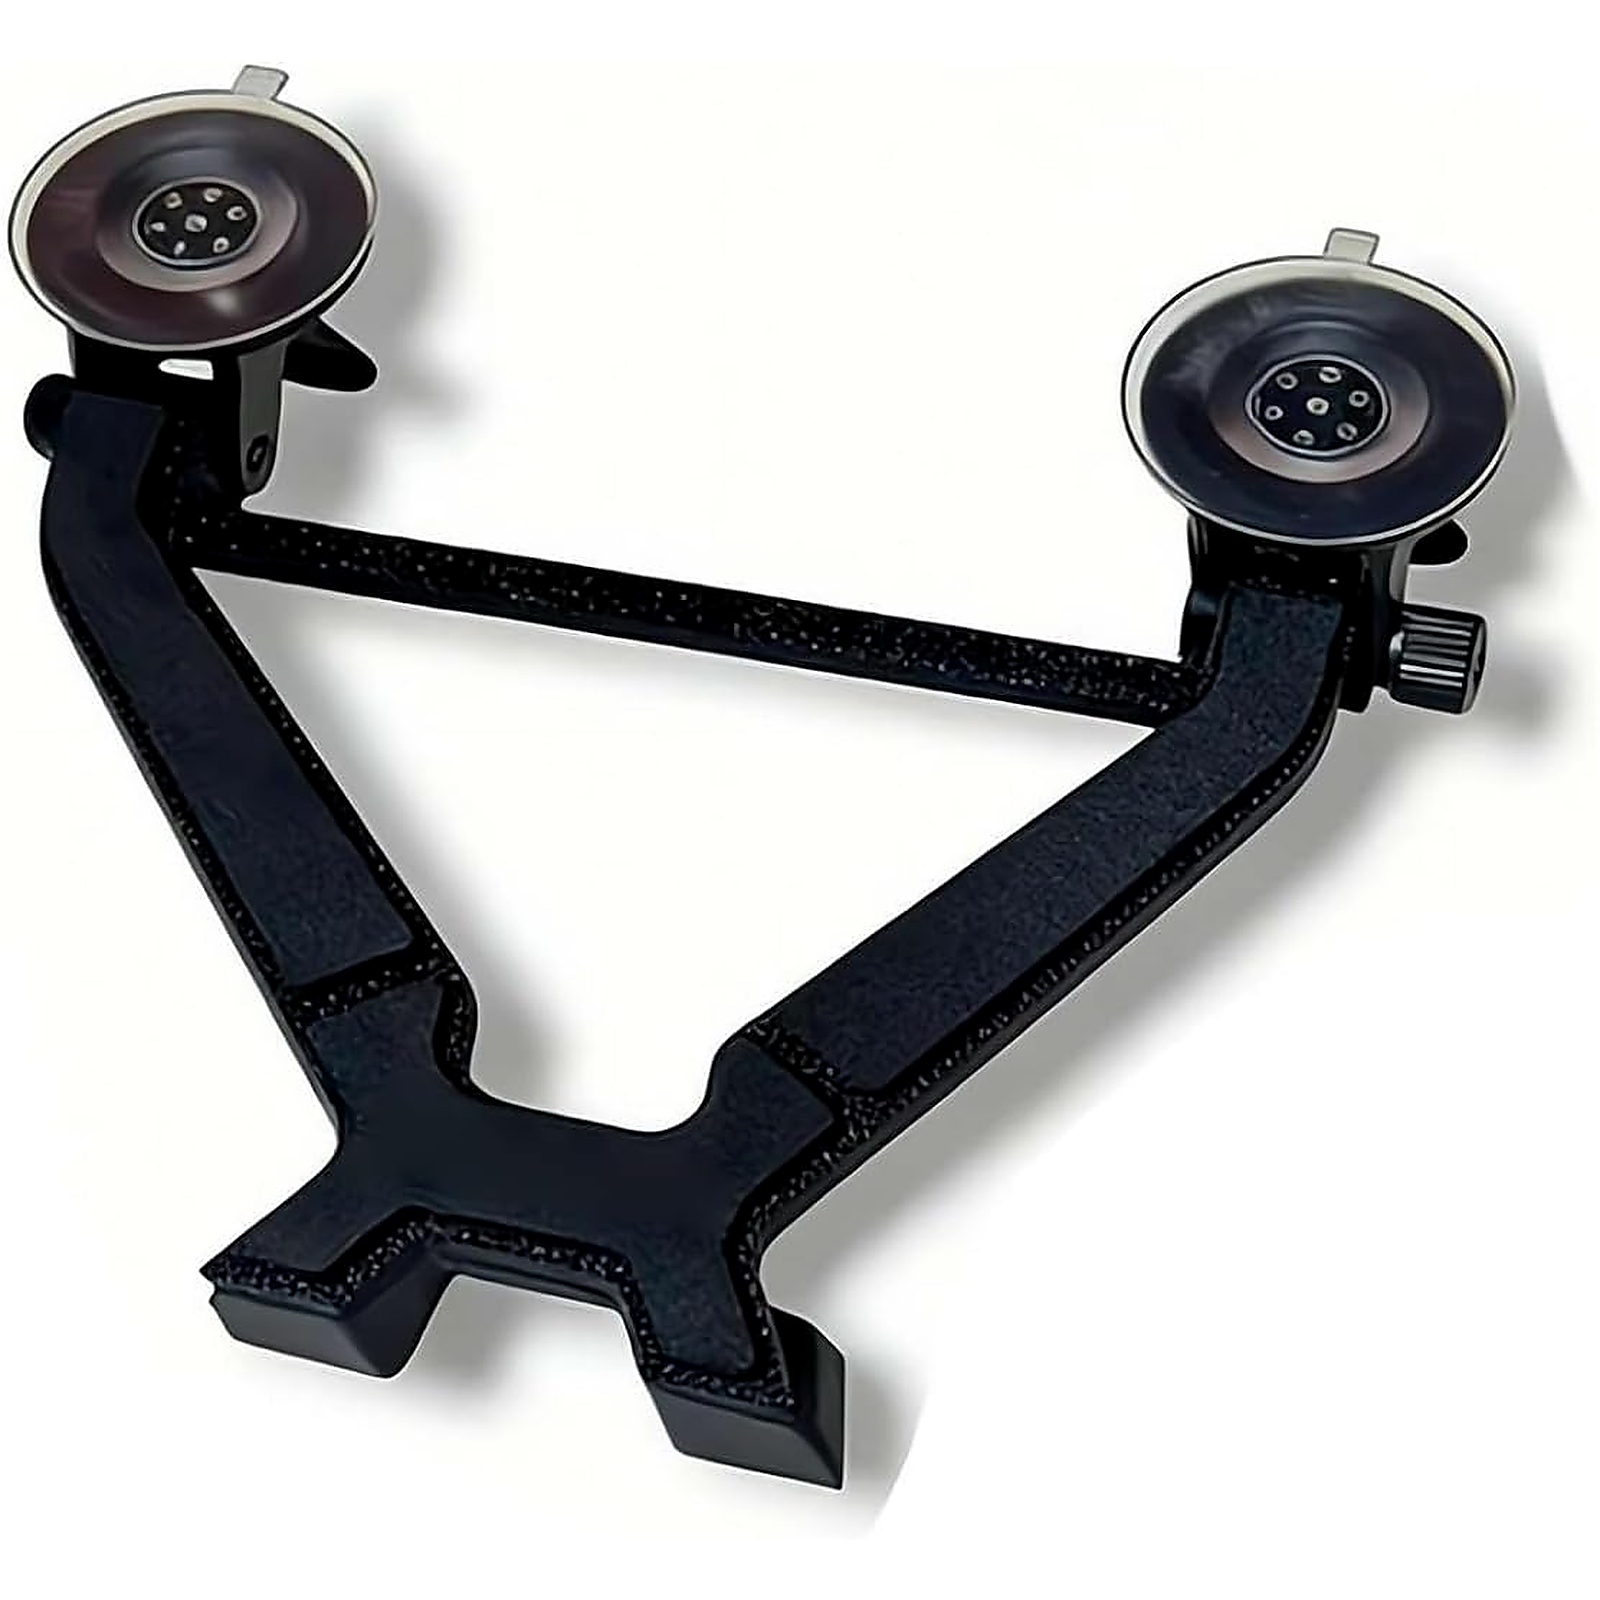
- Dual Suction Cup Design: Attaches to compatible smooth windshield glass for quick, removable setup.
- Crossbar Support Structure: Adds extra stability between the two suction points and helps keep the mount aligned.
- Bottom Support Base: Supports the Starlink Mini from below for a cleaner dashboard-side position.
- Black Anti-Glare Cloth Included: Helps reduce dashboard reflection and light glare under the Starlink Mini area.
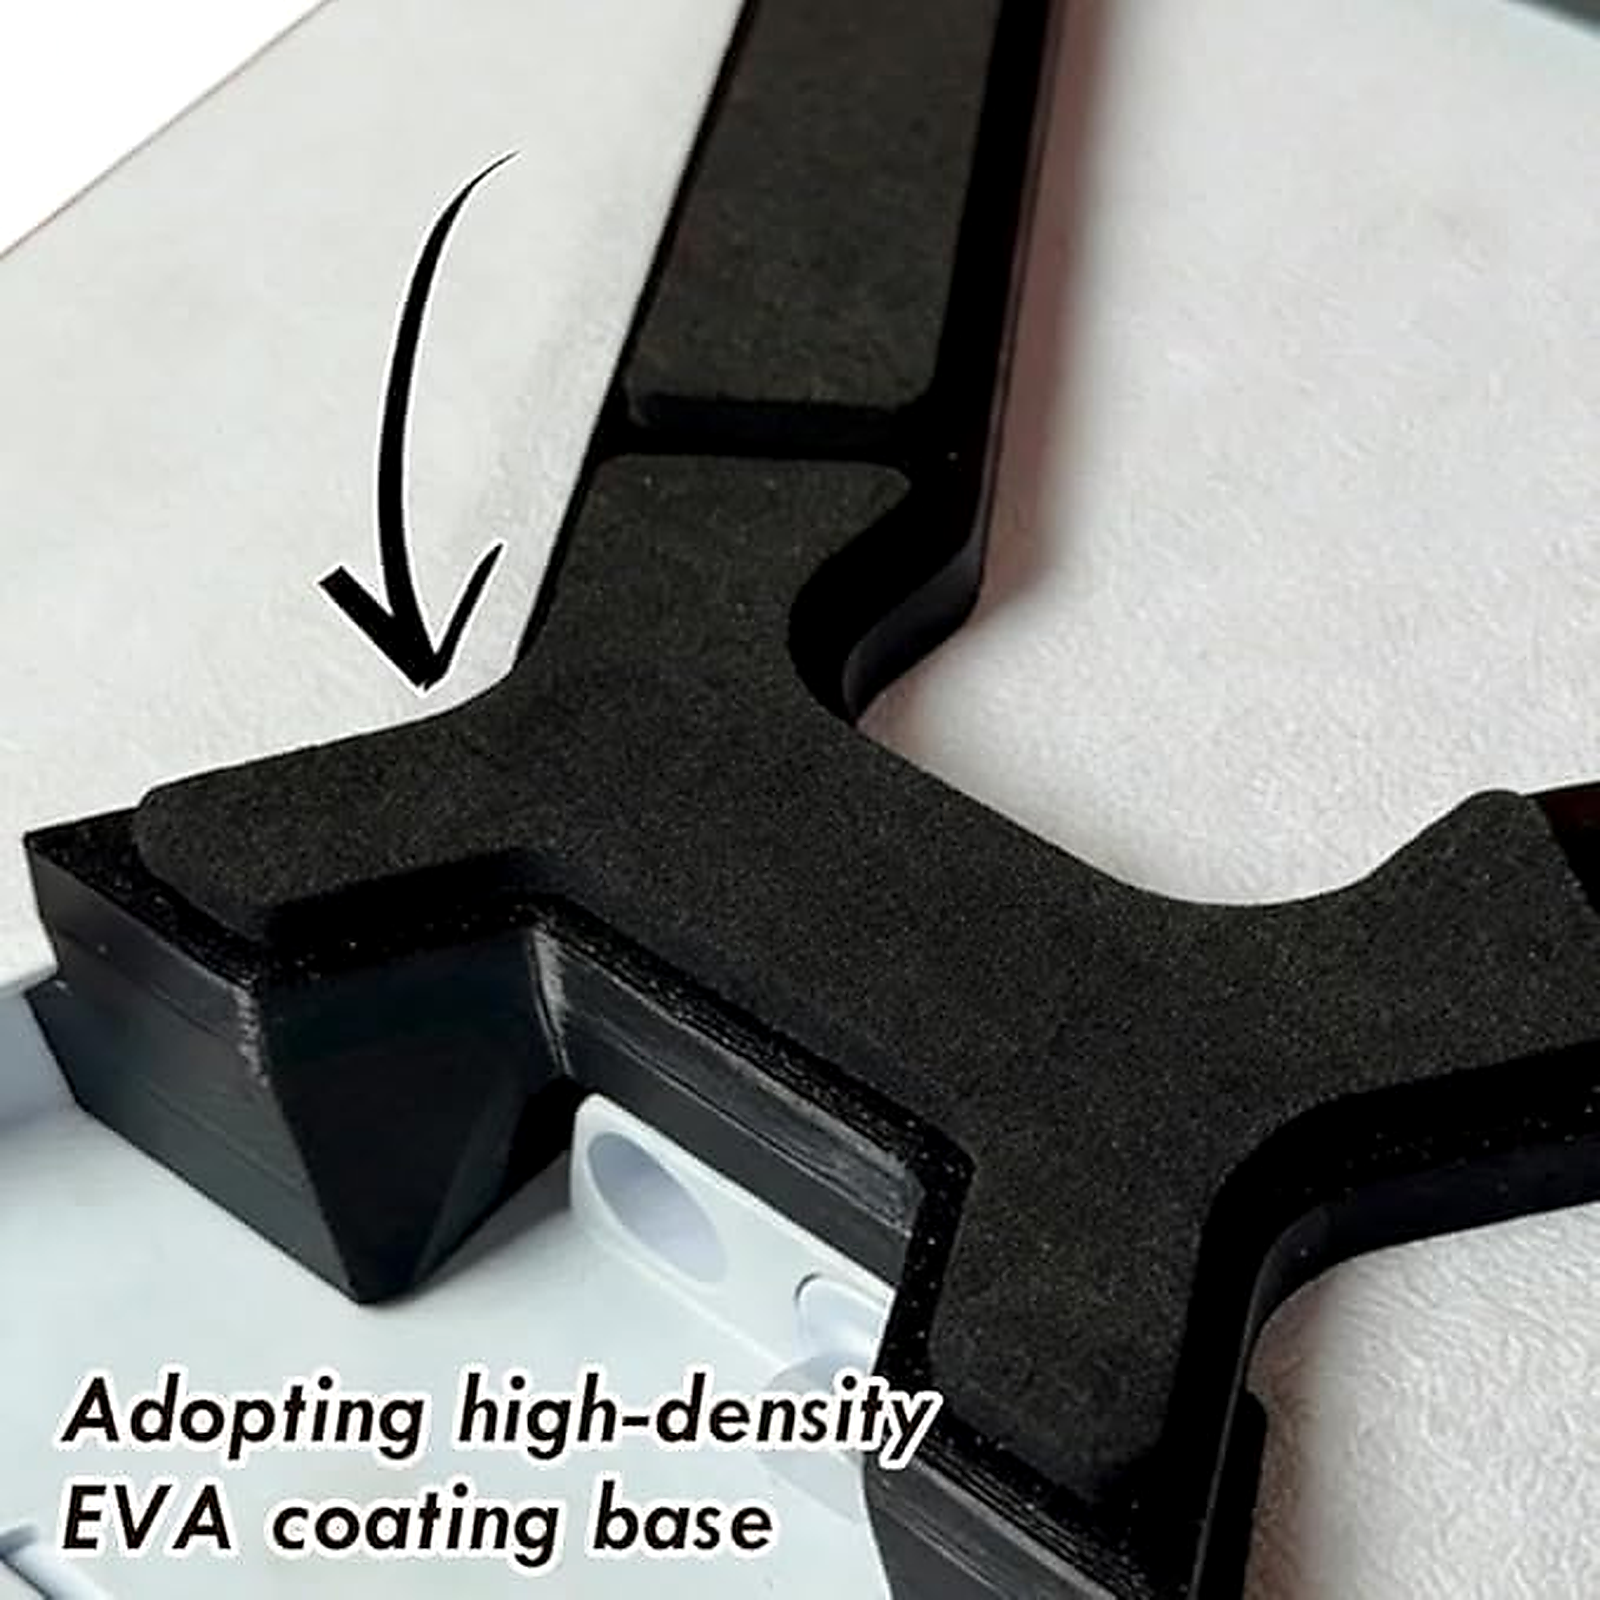
- High-Density EVA Coating Base: Soft contact areas help reduce vibration and protect the supported surface.
- No-Drill Installation: No permanent holes, brackets or roof modification required.
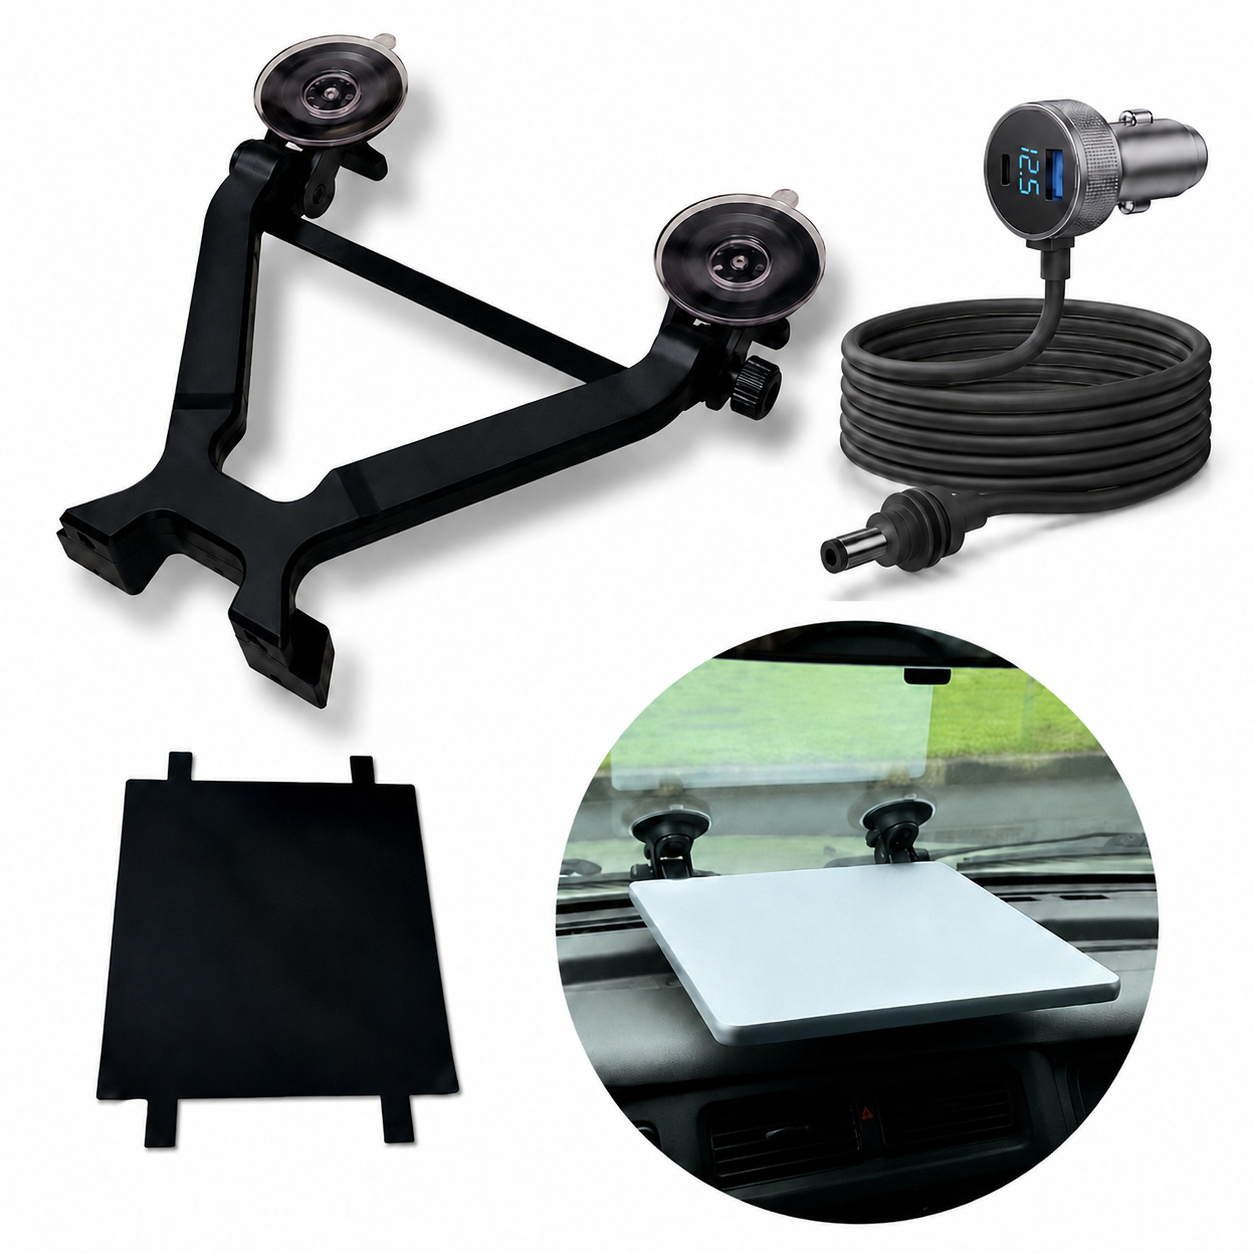
- Optional Power Cable: Current page offers mount only, mount + 3M power cable, and mount + 5M power cable options.
Cleaner Starlink Mini Setup Inside Your Vehicle
Starlink Mini users often need a quick setup for road trips, RV stops, camping breaks and mobile work. Instead of placing the dish loosely on the dashboard, this mount creates a more controlled windshield-side position with dual suction support and a dedicated lower support area.
- Road-Trip Rest Stops: Set up Starlink Mini quickly when parked.
- RV / Van Travel: Useful for temporary internet setup without drilling into the vehicle.
- Camping: Helps keep the dish off dusty tables or wet ground.
- Remote Work: Creates a cleaner in-cabin network setup for parked outdoor work.
Dual Suction + Crossbar Support
The two suction cups give the mount a wider windshield contact area, while the crossbar helps keep the structure connected and aligned. This is more stable than a single loose suction point and more convenient than a permanent roof or wall mount.
- Wider Contact: Two suction cups spread the holding points across the windshield.
- Crossbar Alignment: Helps reduce twisting compared with isolated suction brackets.
- Adjustable Knob: Side knob helps tighten and fine-tune the mounting angle.
High-Density EVA Base For Softer Contact
The EVA coating base helps create a softer support contact area, reducing hard plastic-to-surface contact around the dashboard-side support zone. This detail is important for customers who worry about vibration, rattling or surface marks.
- Soft Support: EVA pad helps cushion the lower contact area.
- Vibration Control: Helps reduce small vibration movement during parked use.
- Cleaner Fit Feel: Makes the mount feel less like a generic hard plastic bracket.
Compact Size For In-Cabin Setup
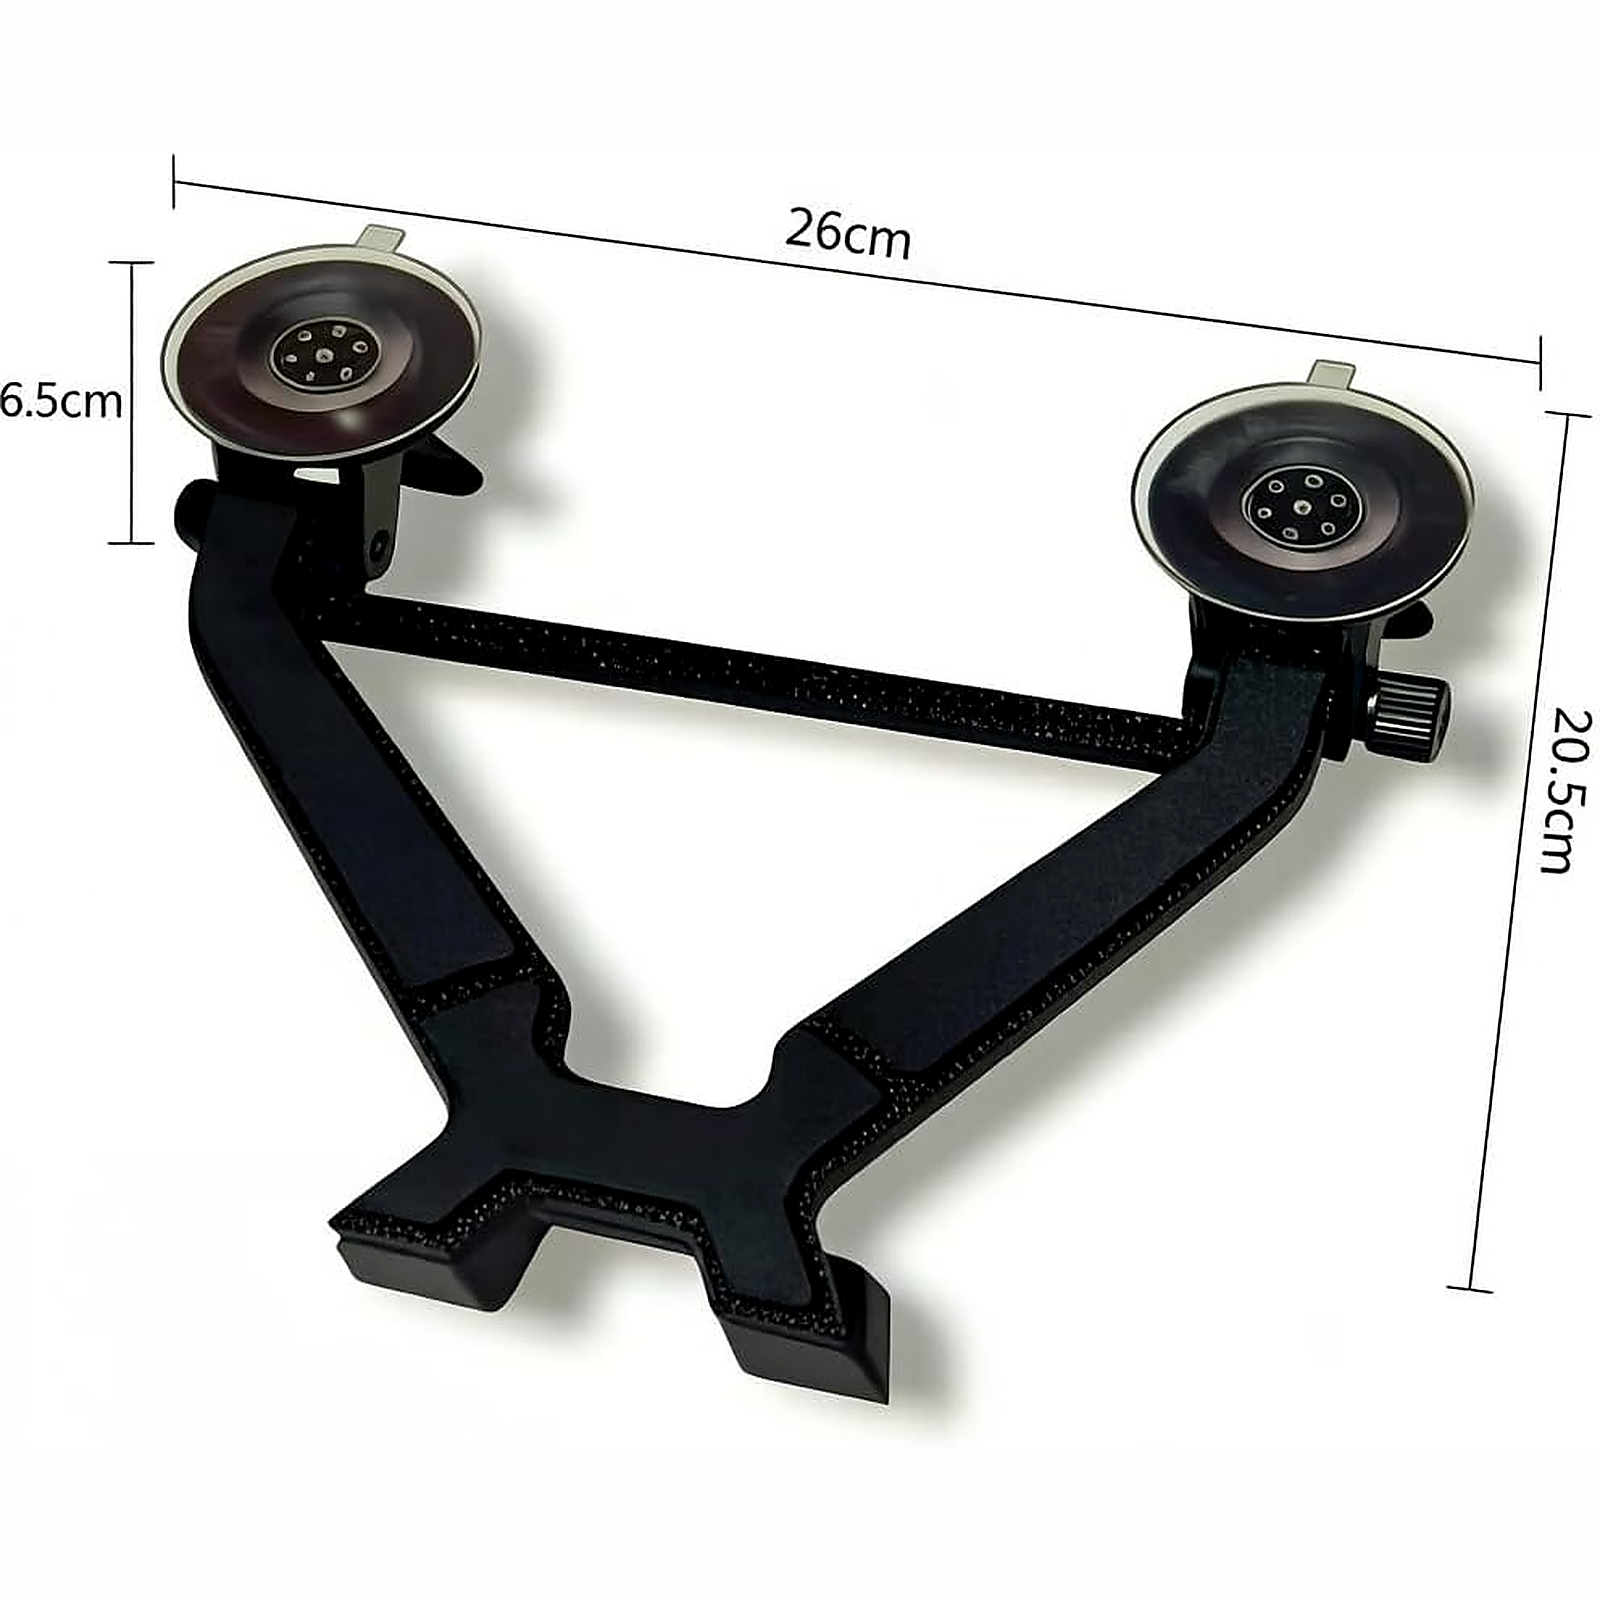
Product images show a 26cm width, 20.5cm height and 6.5cm suction cup diameter. This gives customers a clear sense of the mount size before they install it near the lower windshield area.
| Size Reference | Shown Measurement |
|---|---|
| Overall Width | 26 cm |
| Overall Height | 20.5 cm |
| Suction Cup Diameter | 6.5 cm |
Black Anti-Glare Cloth Helps Reduce Reflection
The included black anti-glare cloth helps reduce bright dashboard reflection around the Starlink Mini setup. This is useful when sunlight reflects from the dashboard or windshield area during parked use.
- Less Reflection: Helps reduce light bounce from the dashboard area.
- Cleaner Visual Setup: Black cloth makes the Starlink Mini area look more intentional.
- Better For Bright Days: Useful in sunny camping, RV and road-trip environments.
Choose Mount Only Or Add A Power Cable
The current page offers three options. Choose the mount-only version if you already have a suitable Starlink Mini power setup. Choose the 3M or 5M cable option if you need cleaner cable routing from your in-vehicle power source to the windshield setup area.
| Option | Best For | What To Check |
|---|---|---|
| Mount + Black Anti-Glare Cloth | Customers who already have the needed Starlink Mini cable and power source | Confirm your current cable length reaches the mount position |
| Mount + Cloth + 3M Power Cable | Compact cabin setups with a nearby power source | Measure the route from power outlet to windshield area |
| Mount + Cloth + 5M Power Cable | Vans, RVs or layouts needing a longer cable path | Plan cable routing so it does not cross pedals, doors or walking areas |
Best For Parked Vehicle Starlink Mini Use
This product should be positioned for parked and stationary vehicle use. That is the safest and clearest conversion message for customers in the US, Canada, Australia and New Zealand who use Starlink Mini for camping, remote work and travel.
- Parked RV Setup: Place Starlink Mini near the windshield during a campsite stop.
- Van Life: Keep the dish in a removable in-cabin position without exterior drilling.
- Outdoor Work: Create a temporary internet setup from a parked vehicle.
- Road Trip Breaks: Use during stationary rest stops, parking areas and scenic stops.
- Bad Ground Conditions: Keep Starlink Mini away from mud, dust, gravel or wet tables.
Installation Notes
For best results, install only on clean, smooth windshield glass and test the suction hold before placing Starlink Mini onto the support base.
- Step 1: Park safely and choose a lower windshield position that does not block visibility.
- Step 2: Clean and dry the glass surface thoroughly.
- Step 3: Press both suction cups firmly onto the glass.
- Step 4: Lock the suction cups and tighten the side adjustment knob.
- Step 5: Place the black anti-glare cloth under the Starlink Mini support area if needed.
- Step 6: Set Starlink Mini on the support base and confirm it sits flat and stable.
- Step 7: Route the power cable safely and check that no controls, vents, airbags or driver sightlines are blocked.
Starlink Mini Compatibility Reminder
This is a Starlink Mini windshield suction mount, not a Tesla model-specific accessory. The page should guide customers by Starlink model, windshield surface and parked setup requirements.
- Compatible Device: Starlink Mini
- Install Area: Smooth compatible vehicle windshield glass
- Core Kit: Suction mount base with crossbar + black anti-glare cloth
- Optional Kits: 3M power cable or 5M power cable versions
- Best Use: Parked RV, van, SUV, camping and outdoor work setup
- Not Recommended: High-speed driving, rough roads, dirty glass, curved non-glass surfaces or any position blocking visibility or safety systems
Why Use A Windshield Suction Mount?
| Scenario | Tesstudio Windshield Mount Kit | Loose Dashboard Placement |
|---|---|---|
| Setup stability | Dual suction cups and crossbar help create a more controlled position | Dish may slide, tilt or shift on the dashboard |
| Installation | No-drill removable windshield setup | No dedicated support structure |
| Reflection control | Includes black anti-glare cloth for dashboard reflection reduction | Dashboard glare may be more visible |
| Cable routing | Optional 3M / 5M power cable supports cleaner setup planning | Cables may be too short, messy or poorly routed |
| Best for | Parked RV, van, camping and road-trip internet setup | Temporary emergency placement only |
Recommended Page Content Order
- First Screen: Windshield Mount Kit For Starlink Mini + dual suction + crossbar + parked-use safety reminder.
- Second Screen: Real installed image inside windshield with Starlink Mini placed on the support base.
- Third Screen: EVA base, suction cup detail and dimensions.
- Fourth Screen: Anti-glare cloth explanation and reflection reduction use case.
- Fifth Screen: Variant guide for mount only / 3M cable / 5M cable.
- Final Screen: Installation notes, safety warnings, compatibility and FAQ.
Frequently Asked Questions
Which Starlink model does this mount fit?
This listing is for Starlink Mini. Do not order for larger Starlink versions unless Tesstudio confirms compatibility separately.
What options are available?
The current page offers Mount + Black Anti-Glare Cloth, Mount + Black Anti-Glare Cloth + 3M Power Cable, and Mount + Black Anti-Glare Cloth + 5M Power Cable options.
Does it include the Starlink Mini dish?
No. This product includes only the selected mount kit option. Starlink Mini dish, router, vehicle and power source are not included.
Can I use it while driving?
It is best positioned for parked or stationary vehicle setup. Do not use it while driving if it blocks visibility, interferes with safety systems, loosens, vibrates or violates local rules.
Where should it be installed?
Install only on clean, smooth windshield glass in a position that does not block driver visibility, airbags, mirrors, vents, controls or legal windshield areas.
Will the suction cups hold on any surface?
No. Suction cups work best on smooth, clean glass. They are not suitable for rough dashboards, fabric, textured plastic, dirty glass, wet glass or highly curved surfaces.
What does the black anti-glare cloth do?
It helps reduce dashboard reflection and glare around the Starlink Mini setup area. It is not a heat shield or permanent dashboard cover.
What are the product dimensions?
The product image shows a 26cm width, 20.5cm height and 6.5cm suction cup diameter.
Which power cable should I choose?
Choose 3M for shorter cabin routing and 5M for vans, RVs or layouts where the power source is farther away. Always measure your cable path before ordering.
Will it affect Starlink Mini signal?
Signal quality depends on sky visibility, windshield angle, glass type, obstruction, vehicle position and Starlink service conditions. Test your setup after installation and reposition if needed.
질문과 답변
이메일, 실시간 채팅, 그리고 자세한 설치 가이드를 통해 도움을 드립니다. 또한, 인플루언서들이 직접 출연하는 단계별 튜토리얼 영상을 제공하여 설치 과정을 도와드립니다.
당사는 1년 보증을 제공합니다(일부 제품은 2년).
네, 설치 후 제품을 제거해도 차량의 원래 배선 하네스에 영향을 미치지 않습니다.
고객이 제품을 받은 후 품질에 문제가 있는 경우 무료로 반품 및 교환해 드립니다.

Subscribe
Join Us - Enjoy our latest news and exclusive discounts & gifts.