


Starlink Mini Magnetic Car Mount with Stainless Steel Bracket & Clear PC Panel

안녕하세요,
2 영업일 이내에 답변을 받지 못하셨다면, 지연에 대해 진심으로 사과드립니다.
더 빠른 답변을 원하시면 WhatsApp (+1 (626) 412-7352 , +86 191 2063 1131 또는 +86 190 2201 1181) 으로 문의해 주세요. 위 번호로 직접 문자 메시지를 보내주셔도 됩니다.
귀하의 인내와 이해에 감사드립니다!
귀찮으시다면, "Tesstudio 공식 설치 서비스"를 위해 남부 캘리포니아 공식 매장을 방문하세요. 저희 전문가가 귀하의 Tesla 액세서리를 완벽하게 설치해 드립니다.
주소:
14761 Franklin Ave unit G, Tustin, CA 92780, 미국
친절히 알려드립니다: 저희는 제품 판매를 전문으로 하며, 전문가에게 설치를 의뢰하실 것을 권장합니다. 부적절한 설치로 인해 발생한 문제는 애프터서비스에 포함되지 않습니다. 양해해 주셔서 감사합니다.
1년 보증을 제공합니다. (인적 손상이 아닌 제품 문제에 대해서는 1년간 애프터 서비스를 제공합니다.)
모든 주문은 FedEx, USPS, UPS, SF Express 등 신뢰할 수 있는 운송업체를 통해 배송됩니다.
모든 주문에 무료 배송 혜택을 누리세요! 재고가 있는 상품은 1~2 영업일 이내에 처리 및 발송되며, 미국 국내 배송은 일반적으로 2~9 영업일이 소요됩니다.
사전 주문 상품이나 일시적으로 품절된 상품의 경우, 배송은 상품 페이지에 제공된 기간에 따라 진행됩니다.
옵션 선택
A Cleaner No-Drill Roof Mount for Starlink Mini
Secure Starlink Mini on a compatible magnetic steel vehicle roof with a low-profile frame, four-point magnetic base and clear protective top panel — without drilling permanent holes.

Stop Leaving Starlink Mini Loose on the Vehicle Roof
A dedicated frame gives Starlink Mini a repeatable mounting position while keeping installation removable when your trip is over.
Mount to a suitable magnetic steel roof without drilling mounting holes into the vehicle.
Starlink Mini sits inside a purpose-shaped surrounding frame instead of resting loose on the roof.
The magnetic mounting approach makes the complete assembly removable when changing vehicles or packing the setup away.
A Full Frame Around the Starlink Mini
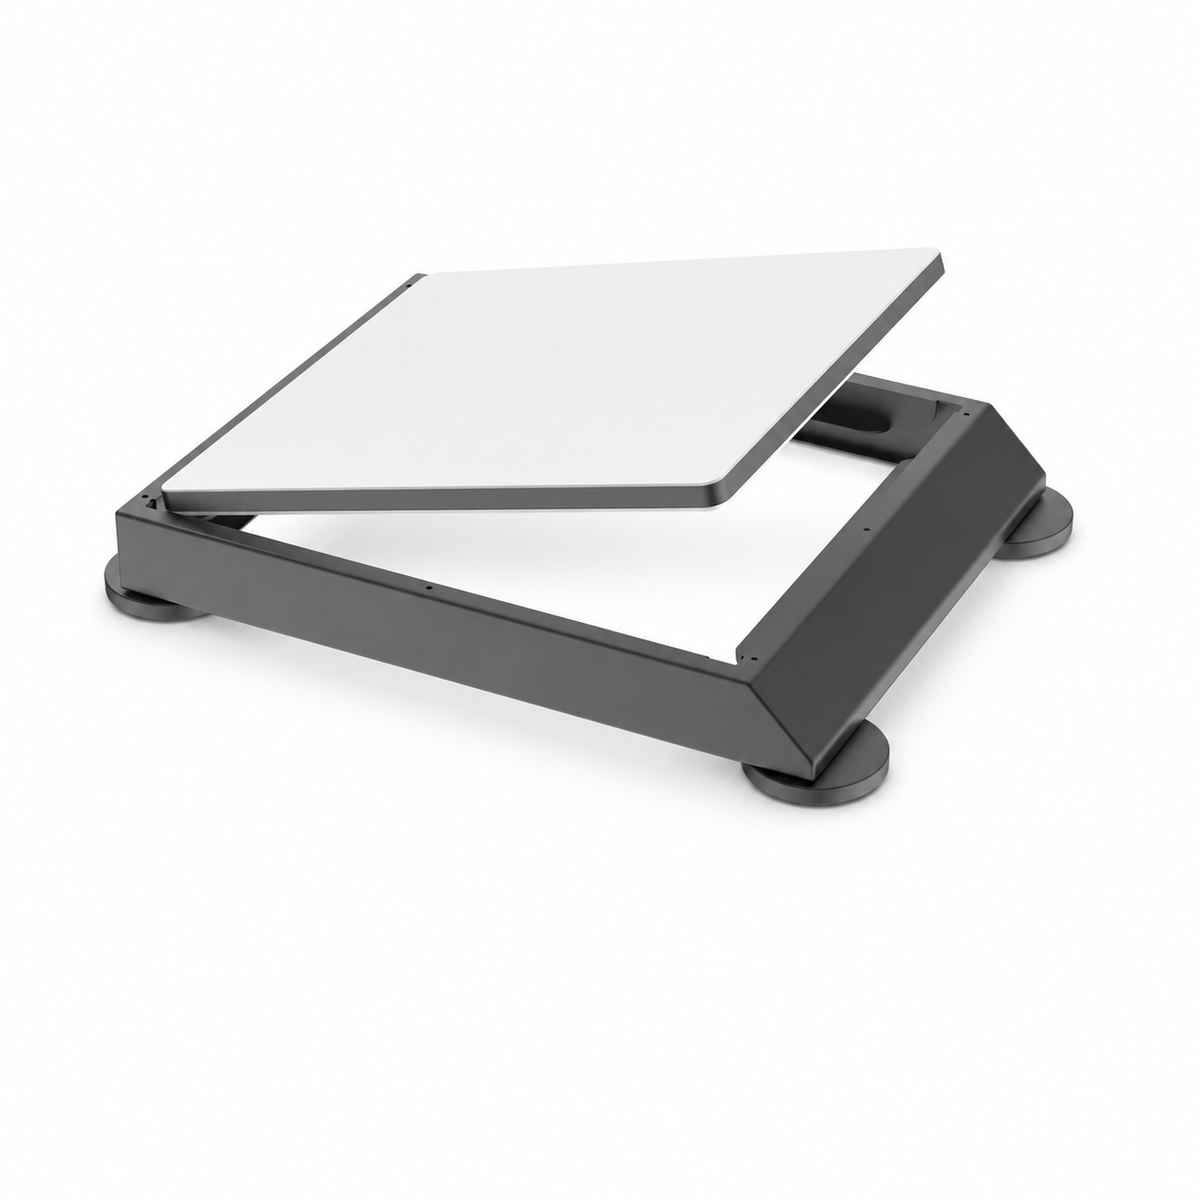
The surrounding metal structure creates a dedicated mounting platform while keeping the dish seated inside the center opening.
Built as a Complete Mounting System
Rather than attaching magnets directly to Starlink Mini, the magnetic bases support an independent outer frame.
The Mini is positioned inside the frame and retained by the clear upper protective panel and mounting hardware.
- Full perimeter metal frame
- Dedicated Starlink Mini center opening
- Four separate magnetic contact points
- Clear removable upper protective panel

Clear Protection Without Hiding Starlink Mini
The transparent upper panel adds another physical layer above the dish while keeping the installation visually clean and low profile.

Six-Point Panel Retention
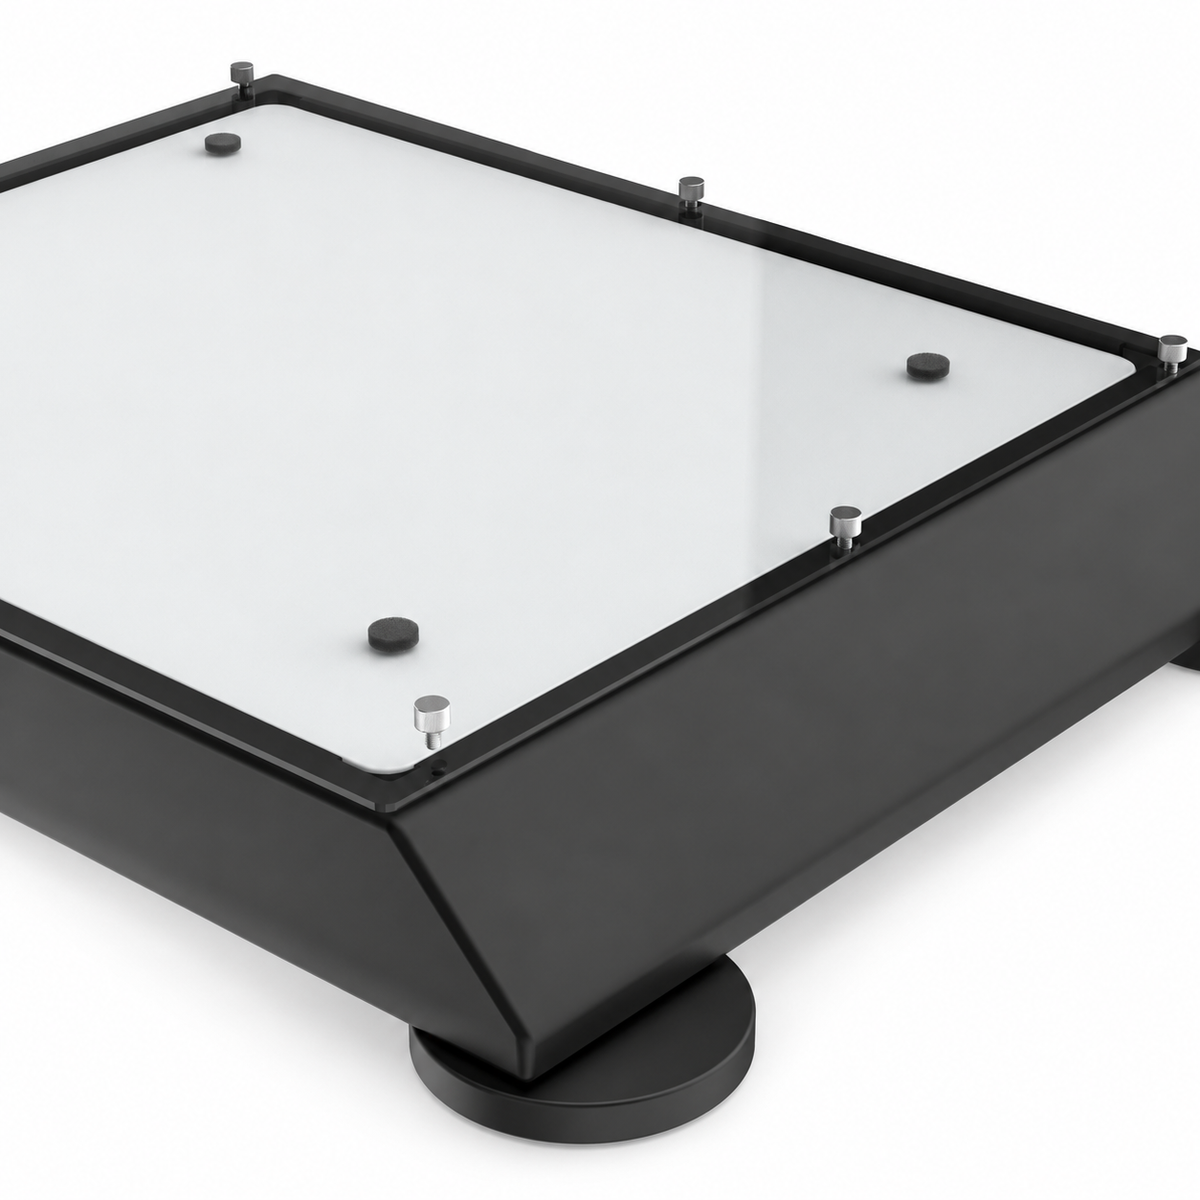
The transparent panel aligns with six mounting points around the upper frame and sits above Starlink Mini after assembly.
- Transparent low-profile protective panel
- Six mounting points around the perimeter
- Helps reduce direct contact with the dish surface
- Removable when access to Starlink Mini is required
Four Magnetic Bases Support the Frame
One magnetic base is positioned near each corner to spread the mounting contact across the roof rather than concentrating it in one point.
Individual Magnetic Feet
Each magnetic base attaches independently to the upper mounting frame using its own washer and locking hardware.
On a gently curved roof, the bases can be positioned individually so all four contact surfaces sit as flush as possible.
- Four individual magnetic contact points
- Independent mounting hardware
- Designed for compatible ferromagnetic steel roofs
- Full contact should be confirmed before every trip

Built in Layers for Easier Assembly and Service
The frame, Starlink Mini and clear upper panel remain separate components, making the dish accessible without replacing the whole mount.

A Cleaner Shape for Vehicle Roof Installation
The tapered outer surround keeps the installation lower and visually cleaner than an exposed universal bracket system.

Designed Around Vehicle Travel
The sloped outer housing gives the complete mount a more integrated vehicle-ready appearance while protecting the edges of the Starlink Mini installation.
- Low-profile surrounding frame
- Tapered exterior shape
- Dish sits recessed within the mount
- Clean black finish for vehicle roof setups
Removable Clear Upper Panel
The transparent top plate uses pre-positioned mounting holes and contact pads to align with the complete frame assembly.

Assemble the Mount in Five Steps
Assemble Starlink Mini inside the frame first, then place the completed mount onto a suitable magnetic steel vehicle roof.

Attach all four magnetic bases to the upper frame using the supplied washers and locking nuts.
Place Starlink Mini inside the frame and confirm that it sits flat and fully seated.
Align the transparent panel with the six upper mounting holes.
Install all six screws evenly. Tighten securely without overtightening the clear panel.
Place the complete mount on clean magnetic steel and verify all four magnetic bases are fully seated.
Check Your Vehicle Roof Before Ordering
Magnetic mounting depends on the material and shape of the vehicle surface — not every metal-looking roof is magnetic.
Full Magnetic Contact Matters More Than the Roof Shape
Even a strong magnet cannot perform correctly when only part of its contact surface touches the vehicle.
Dirt, sand, water, wax buildup and other contamination can reduce direct contact between the magnetic base and roof.
Each magnetic foot should sit flat and make full contact before the vehicle is moved.
Inspect panel screws, magnetic-base nuts, cable routing and overall mount security before travel.
Frequently Asked Questions
Is this magnetic roof mount designed for Starlink Mini?
Does installation require drilling into the vehicle?
Will the magnets work on every vehicle roof?
Can I install the mount on a curved roof?
What is the clear panel for?
How many magnets does the mount use?
How does Starlink Mini stay inside the frame?
Can the mount be removed later?
Do I need to clean the roof before installation?
What should I inspect before driving?
Can I mount it on an aluminum or fiberglass RV roof?
Will it work with Starlink Standard or Gen 3?
Is Starlink Mini included?
Is this an official Starlink product?
Complete Your Starlink Mini Vehicle Setup
Add vehicle power, cleaner cable management or an alternative mounting solution for road trips, RV travel and remote work.
질문과 답변
이메일, 실시간 채팅, 그리고 자세한 설치 가이드를 통해 도움을 드립니다. 또한, 인플루언서들이 직접 출연하는 단계별 튜토리얼 영상을 제공하여 설치 과정을 도와드립니다.
당사는 1년 보증을 제공합니다(일부 제품은 2년).
네, 설치 후 제품을 제거해도 차량의 원래 배선 하네스에 영향을 미치지 않습니다.
고객이 제품을 받은 후 품질에 문제가 있는 경우 무료로 반품 및 교환해 드립니다.

Subscribe
Join Us - Enjoy our latest news and exclusive discounts & gifts.